Add Row
Add Element
Icon for Rugged Trails Network showcasing adventure and outdoor exploration.
update
Rugged Trails Network
update
Add Element
  • Home
  • Categories
    • Vehicle Reviews
    • Adventure Plans
    • Expert Talks
    • Riding Tips
    • Event Coverage
    • Maintenance Guides
    • Tech Innovations
  • Featured Business Profiles
  • All Posts
  • Vehicle Reviews
  • Adventure Plans
  • Expert Talks
  • Riding Tips
  • Event Coverage
  • Maintenance Guides
  • Tech Innovations
  • Featured Business Profiles
July 29.2025
1 Minute Read

ATV and UTV Maintenance Hacks Every Rider Needs

Did you know that missing just a few basic maintenance checks accounts for over 35% of ATV and UTV breakdowns? If you want your ATV or UTV to thrive on any trail and keep you safe, learning maintenance hacks is non-negotiable. This guide is packed with expert-approved ATV and UTV maintenance strategies that will extend your vehicle’s life, boost performance, slash repair costs, and empower you to hit the trails with confidence. Whether you’re a seasoned rider or new to off-roading, mastering these tips will keep your road vehicle ready for any adventure.

Rugged atv and utv parked on a forest trail, clean and well-maintained, with proud owner inspecting. The scene shows natural woodland with dappled sunlight, detailed leaves on the ground, in sharp focus, featuring deep green and earth tones.

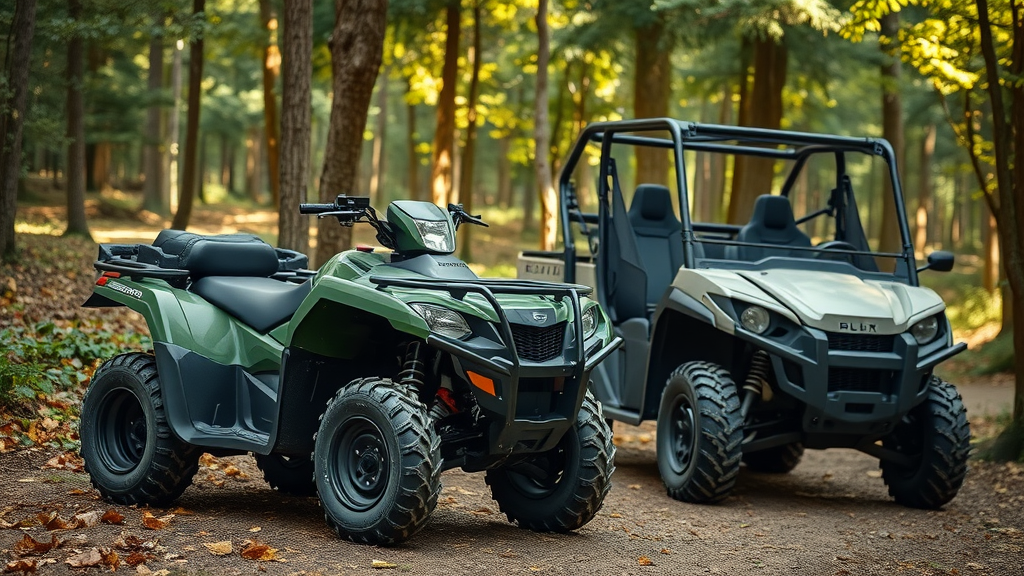
Why ATV and UTV Maintenance Is Your Ticket to Longevity and Safety

  • Did you know that over 35% of ATV and UTV breakdowns are caused by missed basic maintenance checks? This section reveals how proactive atv and utv maintenance not only reduces costly repairs but also extends the life of your road vehicle.

Modern ATVs and UTVs are built tough, but even the most rugged road vehicle can't escape the consequences of neglect. Routine ATV and UTV maintenance is the foundation for both longevity and safety, directly influencing how your machine performs—no matter the terrain. Simple checks, like monitoring engine oil and ensuring proper tire pressure, can catch issues before they derail your adventure or empty your wallet on repairs.

Consider this: a well-maintained UTV is significantly less likely to break down unexpectedly, minimizing the chance of being stranded miles from help. Regular maintenance checks create opportunities to spot small problems, like a loose battery connection or a low brake fluid level, before they escalate into something major. Ultimately, investing a little time each month keeps your ATV or UTV safer, more reliable, and ready to handle whatever the trails throw your way.

What You'll Gain by Mastering ATV and UTV Maintenance

  • Insight into essential atv and utv maintenance routines
  • A maintenance checklist for all major vehicle systems
  • Expert tips for maximizing performance and minimizing downtime

Owning and maintaining an ATV or UTV is more than just occasional cleaning—it's about understanding the essential systems that allow your vehicle to perform at its best. Mastering these maintenance routines lowers the risk of breakdowns and ensures your investment lasts through years of riding. With the right checklist, you'll always know what to inspect and when, taking the guesswork and stress out of vehicle care.

From optimizing tire pressure to ensuring the proper type of motor oil is used, each maintenance step plays a critical role in day-to-day reliability. Armed with the expert tips in this guide, you can confidently identify early warning signs, keep your vehicle’s vital fluids fresh, and save money by avoiding premature part replacement. Consistent atv and utv maintenance adds up to fewer repairs, better safety, and more time riding—not waiting in the shop.

The Ultimate ATV and UTV Maintenance Checklist Every Rider Should Follow

  • Comprehensive maintenance check—from engine oil to brake fluid—for atv or utv reliability and safety.

Every successful rider has a maintenance checklist —and sticking to it is the secret to a trustworthy and efficient road vehicle . The following routine covers all key systems to ensure peak performance:

  • Engine oil & oil filter : Check, change as recommended, and always use the proper type for your machine.
  • Air filter : Clean or replace for consistent airflow.
  • Transmission and differential fluids : Maintain correct levels and change at proper intervals.
  • Brake fluid & pads : Inspect for wear and ensure optimal braking power.
  • Tires : Regularly check tire pressure and note any abnormal wear or puncture signs.
  • Battery and electrical : Secure connections and confirm all lights/electrics function.
  • Coolant level and hoses : Avoid overheating by keeping coolant topped and hoses tight.

By following this maintenance checklist with every major ride or at recommended intervals, you greatly reduce the chance of mechanical surprises and keep your atv or utv trail-ready year-round.

Quick Road Vehicle Inspection: Starting Your Maintenance Check

  • Walkaround procedures for atv and utv—checking lights, frame, battery, and electrical system.

Kickstart any maintenance check with a systematic walkaround. Begin by confirming that all lights—headlights, tail lights, and indicators—function correctly, ensuring your presence is visible in all conditions. Next, scan the frame for cracks or damage that could compromise safety on the trail. Pay special attention to welds or mounting points, as these areas often reveal early signs of strain after rough rides.

Don’t overlook the battery and electrical system . Secure connections prevent power loss that can disrupt ignition or lighting. A quick voltage check can help determine if it’s time for a replacement. Finish by testing horn operation and checking the tightness of all visible wiring for signs of fraying or corrosion. This thorough but easy routine catches minor concerns before they become major headaches during your adventures.

Engine Oil and Oil Filter Best Practices for ATV and UTV Maintenance

  • Choosing the right motor oil for your atv or utv
  • How to change engine oil and replace the oil filter safely and efficiently

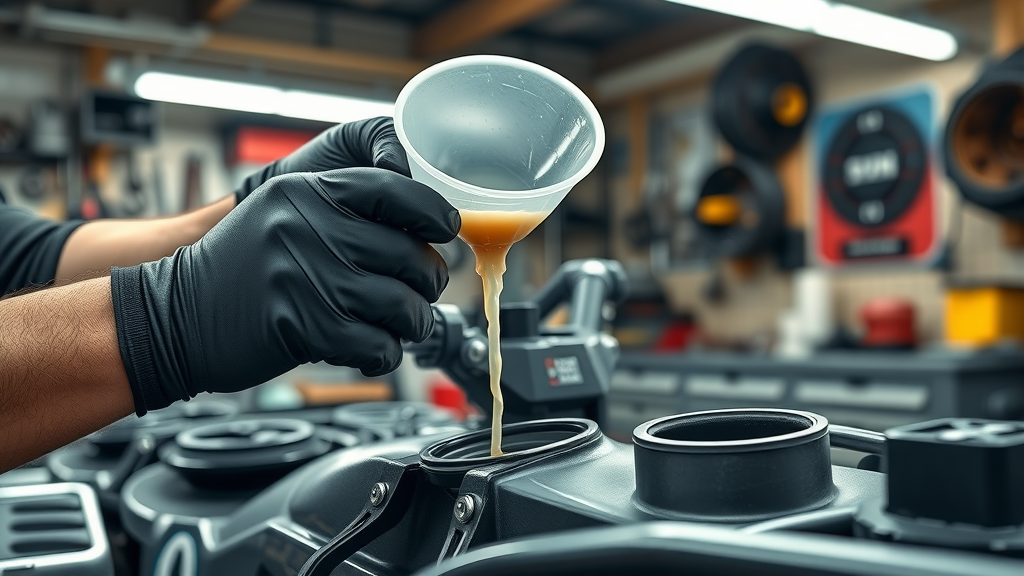
Changing the engine oil and oil filter regularly is essential for atv and utv maintenance . Always use the motor oil recommended in your owner’s manual—many modern vehicles benefit from synthetic oil for improved protection, but conventional oils still find use in some models. The right oil fights engine wear, maintains running temperatures, and keeps contaminants from damaging internal parts.

When performing an oil change , allow the engine to run for a few moments and then cool down, as warm oil drains more easily. Always position your atv or utv on level ground and collect used oil in a container for proper disposal. Replace the oil filter with a model compatible with your machine; this step is just as critical as changing the oil itself. Double-check for any leaks after refilling and run the engine briefly before shutting off to get an accurate oil level reading.

Close-up of a hand checking ATV oil level with a dipstick, performing maintenance in a garage. Highly detailed and lifelike, organized tools in the background, oil sheen on dipstick, mechanical details.

Step-by-Step: How to Check Your Oil in an ATV or UTV

  • How to check your oil level, and when to change motor oil for optimal engine health

Checking your oil level is easier than you think and is key to avoiding costly engine damage. Start by parking your atv or utv on a flat surface and waiting for the engine to cool. Locate the dipstick—usually marked and near the engine. Unscrew and wipe it clean, dip it fully, then check the oil level against the marked range. Oil should be clean, amber, and within the safe zone; dark, gritty oil signals it’s time for an oil change .

Experts recommend changing the motor oil and filter every 20–50 hours of use or at the interval specified in your owner’s manual. If you ride in harsh conditions (mud, sand, or water), shorten service intervals. Staying vigilant with this step ensures long-term engine health and reliable performance, mile after mile.

Transmission Fluid and Differential Fluid: Key Fluids for Trouble-Free Rides

  • Transmission fluid change intervals, signs of wear, and correct filling methods
  • Why differential fluid matters in atv and utv maintenance—symptoms of low or contaminated fluid

Transmission fluid keeps shifting smooth and transmission internals protected, while differential fluid ensures torque is correctly distributed to your wheels. Change transmission fluid every 100 hours or 1,000 miles, but always verify your maintenance schedule for specifics. Cloudy, burnt-smelling, or gritty fluid means it’s time for a change, as these are signs of wear and breakdown.

Filling both fluids requires attention: always use the fluid type listed in your manual, fill to the specified mark (never under or over-fill), and watch for leaks. Differential fluid problems reveal themselves with whining noises, poor handling, or visible leaks around the axles. Spotting these issues early keeps your atv or utv handling sharp and minimizes the risk of drivetrain failure.

Hands wearing gloves refilling ATV differential fluid, pouring fluid with a funnel in a workshop setting, technical tools and spare parts visible. Highly detailed, reflective surfaces, cool and neutral tones.

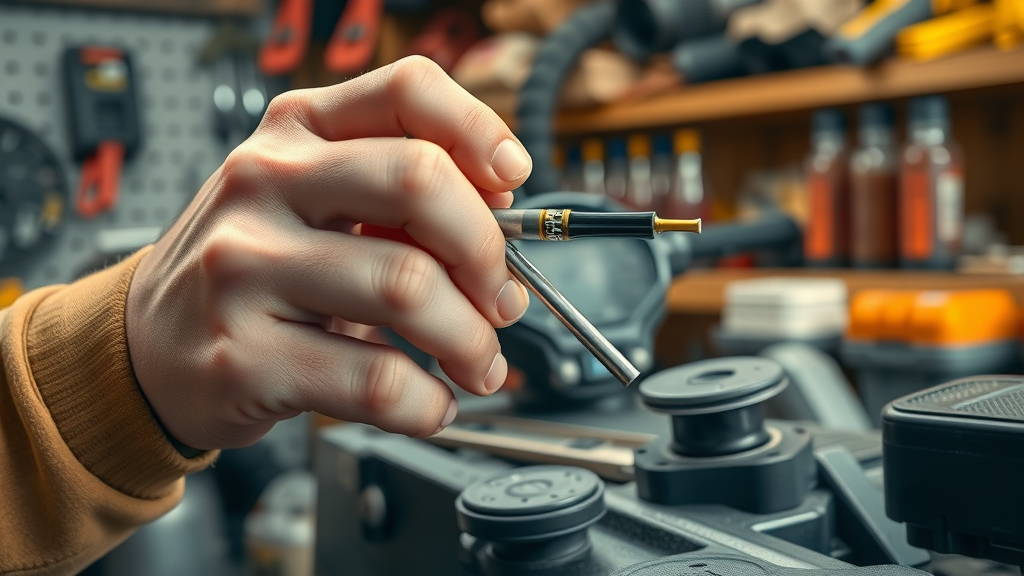
Ensuring Peak Performance: Air Filter and Spark Plug Maintenance

  • When and how to replace your air filter for engine efficiency
  • Spark plug inspection and replacement schedule for atv and utv reliability
  • Recognizing signs of worn-out spark plugs and faulty ignition

For consistent and efficient power, your air filter must be clean and free of debris. Replace or clean it at least every 20–50 hours of engine run time or more frequently if you ride in dusty or wet conditions. A clogged air filter chokes your engine, cutting performance and increasing fuel consumption.

Spark plug maintenance is just as vital. Inspect your spark plugs every time you change your oil, and replace them at least once per season or at intervals recommended by your manufacturer. Signs of worn spark plugs include poor starting, misfiring, or sluggish acceleration. Using the right type and gap for your atv or utv ensures smooth ignition and optimal combustion.

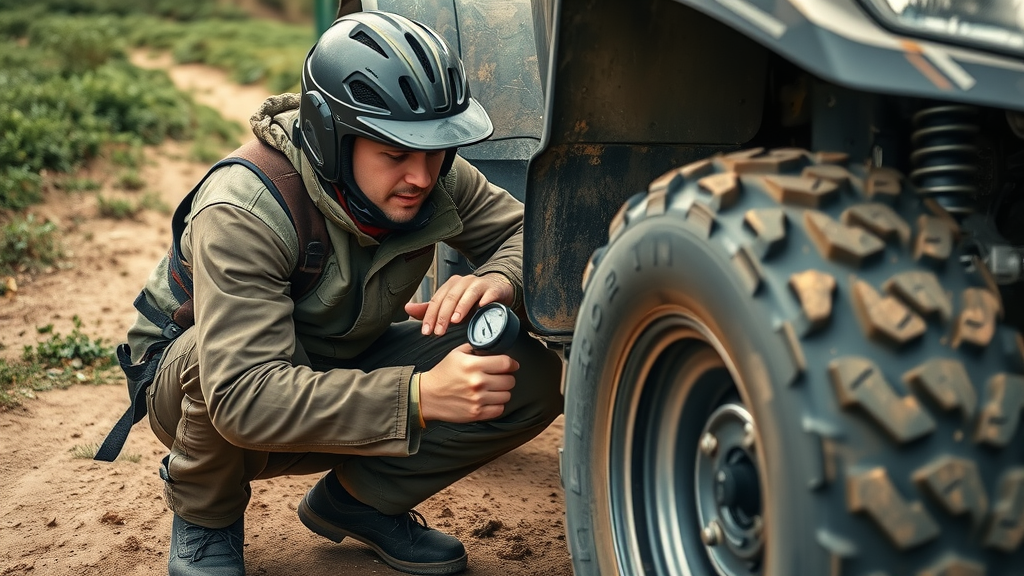
Regular Maintenance Essentials: Tire Pressure, Brakes, and Coolant Level

  • Maintaining proper tire pressure for ride quality and safety
  • Brake fluid inspection, pad wear, and how to check the coolant
  • Setting up a seasonal maintenance schedule for consistent atv and utv performance

Your tires, brakes, and cooling system work together to keep your road vehicle safe and responsive. Always check tire pressure before heading out—underinflated tires risk blowouts, poor handling, and uneven wear. Use a tire gauge and match the numbers to those in your owner’s manual, adjusting for terrain and load when needed. Air pressure fluctuates with temperature changes, so make it a regular check.

Next, check your brake fluid and brake pads for proper levels and signs of excessive wear. Spongy brakes, odd noises, or reduced stopping power mean it’s time for inspection. Brakes are a non-negotiable safety system—never skip their maintenance. Also, monitor your coolant level to prevent overheating, especially in high-load or hot environments. Keep hoses free of cracks and always fill with approved coolant mixtures.

Rider in safety gear checking ATV tire pressure with a gauge, crouched near large rugged tire on a dirt trail, highly detailed tread and dust, natural daylight.

How to Check the Coolant in Your ATV or UTV

  • Guidelines to checking and topping up coolant level, preventing overheating issues

Checking the coolant level is simple but protects your engine from catastrophic overheating. When the engine is cool, locate the coolant reservoir and ensure fluid is above the “min” mark but below “max.” For direct inspections, carefully open the radiator cap only when the engine is cold—never hot, to avoid burns. Add coolant if low, and look for leaks or deposits around hoses and the radiator itself.

Regularly maintaining coolant not only prevents problems but ensures steady performance in all weather. Seasonal checks help catch issues like cracked hoses or low fluid early, giving you peace of mind during long trips and extreme conditions.

  • Visual guide covering major points: engine oil, air filter, spark plug, transmission fluid, brake fluid, and final inspection

For riders who learn best visually, comprehensive video guides are available online that walk through every element of an atv and utv maintenance check . These guides illustrate how to spot trouble signs, perform simple maintenance tasks safely, and use tools effectively—even if you’re a beginner. Watching experts in action offers new confidence as you tackle oil changes, air filter swaps, and brake inspections step by step.

Look for videos that cover actual maintenance checklists, highlight must-have tools, and provide real-world tips—these ensure no step is missed and that your road vehicle gets the attention it deserves. Bookmark these videos for quick reference before and after every riding season.

  • Demonstration of safe and effective oil and oil filter replacement in modern atv or utv models

Oil change videos are invaluable—especially for first-timers. They show how to loosen bolts, drain oil safely, swap out filters, and refill with the right type and amount of motor oil . Video demos also offer tips on cleaning residue, checking for leaks, and resetting maintenance counters, if your vehicle uses them. Following a reputable tutorial streamlines the process and builds your confidence for future DIY tasks.

Remember to use gloves, recycle used oil, and store all tools in an organized kit to make every maintenance session quick, safe, and effective.

Expert-Recommended Maintenance Schedule for ATV and UTV Owners

A Month-by-Month ATV and UTV Maintenance Checklist
Month/Interval Inspect Service Replace
Every Ride Tire pressure, lights, coolant, frame, controls Adjust tire pressure, top up fluids as needed —
Monthly Oil level, brake fluid, air filter, battery Clean air filter, check battery terminals Replace air filter (if needed)
Every 3 Months/50 Hours Transmission & differential fluid, brake pads Change oils, grease fittings Replace oil & filters
Annually/100 Hours Full maintenance check, coolant level, electrical Comprehensive service Spark plugs, critical fluids

Informative infographic-style visual of an ATV maintenance schedule on a clipboard; icons for oil, air filter, tires, brakes; color-coded, organized appearance.

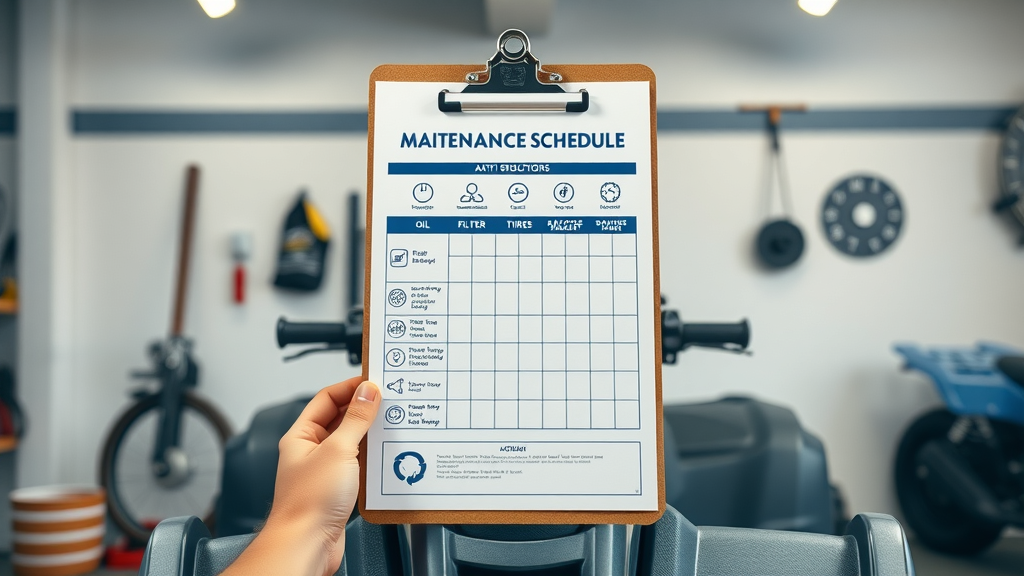
Printable Maintenance Checklist for ATV and UTV Riders

  • Downloadable routine showing intervals for engine oil, air filter, transmission fluid, brake fluid, and tire inspection

Many manufacturers and industry experts offer printable maintenance checklists that you can keep in your garage or glove box. These checklists cover each required task—such as checking the oil and filter , topping up brake fluid, and monitoring tire pressure —along with annotated intervals (by mileage, engine hours, or months).

Having a physical checklist to reference or share with other riders helps you stick to your maintenance schedule and reduces the chance of overlooking crucial steps. Download a template from a trusted resource, laminate it, and mark off each item as you service your atv or utv .

Quotes from Industry Experts on the Value of Consistent ATV and UTV Maintenance

"Preventive maintenance is the best insurance policy you can have for any atv or utv—neglecting service leads directly to costly repairs." — Off-Road Mechanic John S.

Close-up of an experienced off-road mechanic standing confidently next to an ATV, professional workshop setting with tools on the wall, confidence and wisdom in expression.

Top 10 Hidden ATV and UTV Maintenance Hacks the Pros Swear By

  1. Apply dielectric grease to electrical connectors
  2. Use a paint marker to track maintenance dates
  3. Install easy-access drain plugs for faster fluid changes
  4. Check tire pressure before and after every major ride
  5. Keep a dedicated tool kit onboard
  6. Inspect winches and tow points regularly
  7. Check coolant level and radiator fins for debris
  8. Replace spark plugs more frequently if used in wet conditions
  9. Lubricate all moving parts post-wash
  10. Use manufacturer’s maintenance schedule as a baseline

Pro riders and mechanics rely on a few simple hacks to get the most out of every ride. Keeping electrical connections protected, labeling service intervals, and checking fluids before and after each trip are smart moves that prevent major breakdowns. Upgrading to components like easy-access drain plugs or extra tool kits simplifies regular maintenance, while frequent inspections of winches, tow points, and moving parts ensure your machine is always ready for action. Don’t underestimate the value of the manufacturer’s maintenance schedule—it’s a foundational reference for all riders.

People Also Ask: Essential Answers for ATV and UTV Maintenance

What maintenance does an ATV need?

  • Routine atv and utv maintenance includes engine oil changes, air filter cleaning or replacement, checking tire pressure, brake fluid inspection, and overall maintenance check of moving parts for wear or damage.

A proper ATV or UTV maintenance regimen covers changing engine oil and oil filter regularly, cleaning or replacing the air filter , checking and adjusting tire pressure , inspecting brake pads and brake fluid , and giving the frame, controls, and electrical systems a thorough lookover. Stay vigilant for leaks, cracks, or odd noises—these are early signs your road vehicle needs attention. Adhering to this routine keeps your ride powerful and reliable.

How often should a UTV be serviced?

  • Experts recommend a full utv maintenance check every 25-50 hours of use or at least once per season, with more frequent oil changes and filter replacements during heavy use.

The ideal frequency for UTV maintenance depends on your riding style and conditions. At minimum, complete a full check every 25–50 hours or at the start of each season. During especially tough rides—wet, dusty, or muddy environments—increase the frequency of oil and filter replacements. Regular schedules prevent surprises and keep your utv running strong year after year.

How often should I change the transmission fluid on my ATV?

  • Transmission fluid in atv and utv should usually be changed every 100 hours or 1,000 miles, but always refer to your vehicle’s maintenance schedule for specifics.

While most ATVs call for transmission fluid changes every 100 hours or every 1,000 miles, always follow your specific vehicle’s manual. Signs you may need a quicker change include dirty or burnt-smelling fluid and trouble shifting. Staying on top of this service extends the life of your atv or utv ’s drivetrain and prevents expensive repairs.

Are UTVs high maintenance?

  • With regular maintenance, UTVs are no more high maintenance than other road vehicles—adhering to a consistent maintenance checklist greatly reduces breakdown risk.

UTVs may seem high maintenance, but most service is routine and manageable for any rider. Regular checks of the oil, air filter, brake fluid, and critical parts keep issues at bay. Neglect, not complexity, is usually behind most failures. Follow your maintenance checklist and you’ll find owning a UTV both reliable and rewarding.

Most Common ATV and UTV Maintenance Mistakes—And How to Avoid Them

  • Neglecting the maintenance schedule, using the wrong motor oil, forgetting to check air filter or tire pressure, and ignoring early warning signs are leading causes of unexpected atv or utv issues.

Many mechanical issues stem from overlooked basics: missing scheduled services, using incorrect motor oil , failing to monitor air filter or tire pressure , and ignoring strange sounds or warning lights. Each of these seemingly small mistakes can snowball, leading to catastrophic breakdowns and expensive runs to the shop. Avoid these missteps by keeping a strict maintenance checklist , tracking all services, and addressing minor problems before they turn major.

Invest in the right supplies, document every service, and stay informed about your machine’s needs. This proactive attitude is what separates seasoned riders from those left stranded on the trail.

  • A hands-on visual guide for checking and replacing spark plugs to ensure reliable ignition and performance.

Learning to inspect and replace spark plugs through hands-on tutorials makes a world of difference in your maintenance routine. These videos reveal what worn or fouled plugs look like, how to gap new plugs correctly, and how to install them to maintain optimal engine performance. Reliable ignition is crucial for every ride—get this skill down and your atv or utv will always start with confidence.

Pair video learning with your printed maintenance checklist to reinforce best practices for routine maintenance and give yourself the confidence to handle any minor repair on the trail or at home.

FAQs About ATV and UTV Maintenance

  • What type of brake fluid does my ATV or UTV need?
    Always use the type specified in your owner’s manual—most ATVs and UTVs require DOT 3 or DOT 4. Using the wrong fluid can damage seals and reduce braking effectiveness.
  • Can improper maintenance void warranty coverage?
    Yes, skipping required maintenance or not using approved oils, filters, or fluids can void warranty claims if parts fail. Always record your services and follow the official maintenance schedule.
  • How do I store my ATV or UTV for winter?
    Clean your machine thoroughly, fill the tank, stabilize fuel, disconnect the battery, and elevate tires if possible. Store in a dry, ventilated location and consider using a fitted cover.
  • Are there smartphone apps for tracking maintenance checks?
    Yes, several apps allow you to log services, schedule reminders, and track parts or fluid changes for your ATV or UTV—streamlining your maintenance routine year-round.

Key Steps to Start Your ATV and UTV Maintenance Journey Today

  • Follow the strategies in this guide to maximize the value and lifespan of your atv or utv, and always reference your owner’s manual for vehicle-specific recommendations
  • Share your favorite maintenance hack or success story with the atv or utv community!

Start today: check your fluids, print your maintenance checklist , and connect with fellow riders to exchange tips and stories. Every expert began with one routine check—now it’s your turn to make peak performance your standard.

Riding Tips

0 Views

0 Comments

Write A Comment

*
*
Related Posts All Posts
07.30.2025

Don’t Ride Without This Off-Road Safety Equipment

Did you know that over 20,000 off-road accidents are reported in the US each year? What’s even more shocking—many of these incidents could be prevented with the right off-road safety equipment. If you’re ready to experience the thrill of trail riding, rugged terrain adventures, or dirt bike challenges, the proper safety equipment isn’t just recommended—it’s essential for your protection. In this comprehensive guide, you’ll discover why investing in quality safety gear is a life-saving choice, how to pick the best products for any off-road environment, key brands dominating the market, and expert tips to ensure your gear delivers the highest level of protection. Whether you’re navigating remote areas, prepping for your next trail expedition, or simply looking for peace of mind, this article arms you with everything you need to ride smart and stay safe. What You’ll Learn Why quality off-road safety equipment is a must-have How to choose essential safety gear for maximum protection Types of gear every adventurer needs—explained Expert reviews of top-rated safety collections How to build and maintain your ultimate gear kit FAQs and real stories that highlight why you should never skimp on safety Why Quality Off-Road Safety Equipment Saves Lives: Statistics and Surprising Facts Every year, over 20,000 off-road accidents are reported in the US—many could be prevented with proper safety gear. Discover the essential off-road safety equipment that every adventurer should own to minimize risks and maximize fun. Off-roading is an exhilarating experience , but it comes with risks that should never be underestimated. Statistically, the majority of serious injuries and fatalities during outdoor adventures involve riders who weren't using proper off-road safety equipment. Helmets alone reduce the risk of severe head injury by up to 60 percent, while body armor and protective gear can cut traumatic injuries by nearly half when navigating rugged terrain. Studies by the Outdoor Safety Foundation show that improper or missing safety gear contributes to the severity of more than 50% of off-road emergencies. While no equipment can make you invincible, proven, certified safety equipment provides critical protection, ensuring you return from each adventure with stories to tell—not wounds to treat. Investing in the right gear is not just about meeting regulations; it’s about making the great outdoors a safer playground for everyone. Choosing the Best Off-Road Safety Equipment for Unmatched Protection Selecting off-road safety equipment can be daunting, with so many brands and products claiming to offer the best protection. To make an informed choice, consider your typical riding environment, preferred activities (such as using a dirt bike or UTV), and the unique safety needs of your vehicle. Always prioritize equipment that meets or exceeds independent safety standards and has positive total reviews from real-world users. Pay attention to safety features such as proper fit, ease of use, breathability, and impact resistance. Investing in top-tier protective gear means looking for durable materials that can withstand the abuse of rugged terrain and repeated use. Road collection setups often provide specialized safety solutions tailored to ATVs, UTVs, and dirt bikes, making it easier to select items needed for your specific adventure. Key Features to Look for in Off-Road Safety Gear Impact resistance Breathability Ease of use Durability in extreme conditions Compliance with safety standards Impact resistance is perhaps the most vital feature across all types of off-road safety equipment . Sturdy materials—like polycarbonate for helmets or reinforced fabrics for body armor—absorb shocks and protect against falls and debris. Breathability ensures comfort over long rides, preventing overheating in challenging trail conditions, while ease of use allows you to gear up quickly, enhancing both safety and convenience. Always look for durability—gear should survive mud, rain, and rocky trails without showing premature wear. Equally important is compliance with safety standards . Check for certifications such as DOT, ECE, or Snell for helmets, and EN or CE for other protective gear. This guarantees that your safety equipment provides the highest level of defense, no matter the conditions. Understanding Different Types of Safety Equipment for Off-Road Expeditions Helmets Boots Gloves Body armor Eye protection First aid kit Tire repair kits Communication tools Each component of your off-road safety equipment kit serves a specific purpose in safeguarding you against the unpredictable. Helmets are mandatory for protecting your head from impacts, while boots and gloves shield your hands and feet from abrasion and twisting injuries during trail riding or a sudden fall. Body armor includes items like chest protectors and knee guards, defending your torso and limbs from debris and the harsh elements of the great outdoors. Eye protection is crucial for preventing dust, sand, and flying debris from interfering with your vision—especially in dusty or muddy areas. Always include a reliable first aid kit and tire repair kits in your gear. These items are often overlooked but become lifesavers in remote areas where help may not arrive quickly. Communication devices such as onX Offroad packs or rugged radios ensure you can call for assistance if needed, bringing you true peace of mind during your adventures. "Proper off-road safety equipment is the first line of defense against serious injury." — Outdoor Safety Foundation Type of Off-Road Safety Equipment Essential Feature Price Range Best For Helmet Impact absorption $70-$600 All riders First aid kit Emergency care $25-$100 All excursions Tire repair kit Mobility restore $15-$75 Off-road vehicles Body armor Full-body protection $80-$300 Extreme terrain Eye protection Dust/sand defense $20-$100 Trail riding Expert Reviews: Top-Rated Off-Road Safety Equipment Collections With so many choices on the market, it’s wise to rely on expert and community reviews when building your off-road safety equipment arsenal. The road collection from leading brands offers packages that bundle everything from body armor to tire repair kits, so you’re ready for any trail conditions. Brands like Fox Racing, Leatt, and Alpinestars set the bar for dirt bike safety gear, while First Aid Only and Slime deliver robust aid kits and tire repair solutions—earning thousands of positive total reviews from real-world users. Many riders also favor the onX Offroad communication packs, which include GPS and emergency radios, providing critical connectivity when navigating remote or rugged terrain. When shopping for your safety gear, focus on platforms that offer verified consumer feedback. This ensures you purchase only the most reliable and field-tested off-road safety equipment supporting both peace of mind and performance. Comparing Leading Brands in Off-Road Safety Equipment Fox Racing Leatt Alpinestars First Aid Only Slime (tire repair) onX Offroad communication packs Fox Racing and Alpinestars consistently earn top marks for rugged, comfortable, and stylish safety gear that’s as popular with trail riding enthusiasts as it is with competitive racers. Leatt is celebrated for their innovative body armor and neck braces, combining lightweight materials with superior protection. First Aid Only offers comprehensive aid kits designed specifically for off-road emergencies, while Slime tire repair kits are trusted for reliable, on-the-spot repairs when proper tire fixes are a must. onX Offroad has become a game-changer with their navigation and communication packs—making it easy to track your route, communicate across difficult terrain, and stay safe in remote areas where traditional contact may be impossible. When comparing leading brands, look for a combination of advanced protective technology, reasonable price points, positive total reviews, and compatibility with the road vehicles and environments you tackle most often. Spotlight on Road Collection and Dirt Bike Safety Gear Modular solutions for ATV, UTV, and dirt bikes Specialized items for terrain-specific safety Smart adventurers gravitate to road collection bundles and terrain-specific setups, which package essential items—including helmets, protective body armor, gloves, and dedicated aid kit supplies—optimized for particular vehicles. Dirt bike riders especially benefit from lightweight armors and robust boots that provide agility without sacrificing safety. ATV and UTV enthusiasts often opt for integrated communication devices and advanced navigation aids, like onX Offroad kits and rugged radios, ensuring their gear keeps up with the demands of diverse trail conditions. Each kit is engineered for the rigors of off-road use, offering resilience against mud, water, and impact. Features like modular carrying cases and weatherproof materials add another layer of protection and organization, ensuring every rider is equipped to handle emergencies, perform quick trail repairs, and confront unpredictable elements while out on the great outdoors. How to Build the Ultimate Off-Road Safety Equipment Kit Start with certified helmet and gloves Choose body armor suited to your vehicle and terrain Pack a comprehensive first aid kit Include a tire repair kit and spare tools Add communication devices (e.g., onX Offroad kits) for emergency contact Invest in weatherproof clothing and eye protection Add water, snacks, and navigation aids Building the ultimate off-road safety equipment kit starts with a certified helmet, gloves, and essential protective gear such as boots and body armor. Next, select a comprehensive first aid kit —opt for one expressly designed for rugged terrain, including treatments for cuts, burns, and sprains. Pack a reliable tire repair kit with a portable air compressor to keep tire pressure optimal and enable trail repairs, especially in remote areas where help is far away. Don’t forget high-quality communication tools. onX Offroad kits, satellite radios, or rugged radio sets provide a direct line to emergency services or your group, ensuring you stay connected throughout your adventure. Finish your kit with weatherproof attire, sturdy carrying cases, navigation aids, sufficient hydration, and trail snacks to guarantee readiness for any scenario. Remember, thorough preparation brings peace of mind on any trail. Essential Maintenance Tips for Off-Road Safety Equipment Longevity Regularly inspect for wear and tear Clean after every ride Store in a dry, secure location Replace damaged or expired items (e.g., aid kit contents, helmet after a crash) Longevity and reliability are the hallmarks of excellent off-road safety equipment . Begin by thoroughly inspecting every piece after each adventure: check for cracks in helmets, frayed straps, worn-out boots, or torn gloves. Clean your gear meticulously, removing mud, sand, and dirt build-up—which can degrade materials and reduce the lifespan of your safety gear. Store all items in a cool, dry place away from direct sunlight or moisture. This prevents the growth of mold and mildew, which can ruin both your investment and your safety features. Always stay vigilant: replace any aid kit contents that are expired, retire helmets after any significant impact, and never hesitate to upgrade gear that shows signs of structural weakness. Proper maintenance ensures your off-road safety equipment provides maximum protection every time you ride. Real Stories: Off-Roaders Who Owe Their Lives to Proper Safety Equipment "My helmet cracked but saved my life during a trail rollover. Never skimp on safety gear." — ATV Enthusiast Real-world experiences reinforce the irreplaceable value of proper safety equipment . Riders share harrowing stories of trail riding incidents on rugged terrain—rollovers, sudden drops, or collisions—where high-quality off-road helmets and robust body armor literally made the difference between walking away and a tragic outcome. Protective gear is not just about compliance; it’s a crucial investment in your own survival. A growing number of testimonials, backed up by thousands of positive total reviews, emphasize that comprehensive safety gear —from certified helmets to complete aid kits and swift tire repair solutions—delivers peace of mind. When push comes to shove, it’s the gear you rely on that keeps you trail-ready and ensures every outdoor adventure ends safely. People Also Ask: Off-Road Safety Equipment FAQs What is the most essential off-road safety equipment? Experts agree that a certified helmet, sturdy boots, gloves, body armor, first aid kit, and tire repair kit provide baseline protection for any off-road activity. The absolute essentials for any off-roader include a certified helmet, reliable boots, and gloves for direct contact protection. Body armor shields your core from painful impacts, while an easily accessible first aid kit and a basic tire repair kit combine to cover the most urgent field emergencies. With these basics, you’re prepared to handle the most common hazards found in any trail or rugged terrain environment. Do off-road safety gear requirements differ by terrain? Yes. Rocky, muddy, or desert terrain may require specific types of body armor, eye protection, or tire kits. Always tailor your gear to your adventure environment. Absolutely. The type of off-road safety equipment you need will depend largely on the terrain and the type of road vehicles or dirt bike you’re riding. Rocky slopes may demand reinforced knee and elbow guards, while dense forests make enhanced eye protection critical. For mud or sand, proper tire kits and portable air compressors are key. Always match your gear to trail conditions for the highest safety level and to avoid unexpected hazards. Top Accessories to Enhance Your Off-Road Safety Equipment Kit LED helmet lights Emergency signaling devices GPS and satellite phones onX Offroad navigation apps Advanced first aid and trauma kits For the enthusiast seeking the highest level of protection, supplement your core off-road safety equipment with must-have accessories. LED helmet lights improve visibility for both you and fellow riders during dusk or night rides. Emergency signaling devices—a whistle, flare, or brightly-colored panel—offer peace of mind if you’re separated from your group. GPS units and satellite phones bridge communication gaps in remote areas, keeping your group connected and prepared for any eventuality. Apps such as onX Offroad deliver advanced navigation, real-time trail conditions, and location sharing, especially when paired with robust road collection gear. Upgrade your aid kit to a trauma-ready setup, capable of handling more serious injuries. With a well-rounded kit, equipped for any emergency, you can confidently tackle even the toughest terrain. Before heading out, it’s critical to perform a safety check—inspect your helmet for cracks, test communications equipment, verify tire repair kits and air compressors are stocked, and ensure your first aid kit is up to date. Many leading brands and off-road communities offer step-by-step video guides so you can learn best practices from the pros. Road Collection and Off-Road Safety Equipment: Making the Right Choice for Your Vehicle Compare collections for UTVs, ATVs, dirt bikes, and dual-sport vehicles so you select compatible safety equipment tailored for your style. It’s crucial to match your off-road safety equipment to your specific ride—be it a dirt bike, UTV, ATV, or a dual-sport vehicle. Road collection sets are curated for different platforms, factoring in weight, exposure to elements, and storage needs. Consult brand-specific guides to create a kit optimized for your vehicle and the unique challenges of each environment. Tailored safety equipment sets ensure the best protection, comfort, and peace of mind for any adventure. Knowing how to handle a tire puncture or blowout is vital. Experts recommend watching training videos demonstrating the use of proper tire repair kits, portable air compressors, and onX Offroad navigation to locate help or map a way out of challenging terrain. These skills transform a potential trip-ender into a simple trail repair, keeping your adventure rolling. How to Find Trusted Retailers for Off-Road Safety Equipment Check for product certifications and authenticity Read verified reviews on major platforms Explore road collection shops and online specialists Ensure hassle-free returns and warranty options Ensure you’re buying authentic, certified off-road safety equipment by shopping at established specialist retailers and verified online stores. Look for clear certifications and customer reviews focused on real-world performance and after-sales support. Reputable sellers offer straightforward returns, robust warranties, and expert advice—maximizing both value and your road collection’s effectiveness. Your Next Adventure Starts Safely: Invest in Quality Off-Road Safety Equipment Today Browse top-rated off-road safety equipment now to protect yourself and stay trail-ready wherever your journey takes you. Make safety your number one priority before your next ride—explore the best in certified helmets, armor, communication tools, and accessories to ensure every adventure is secure and unforgettable! FAQ: Everything You Need to Know about Off-Road Safety Equipment How often should off-road safety equipment be replaced? Replace helmets after any impact. Update first aid kits annually or after use. Check gear every season or before major trips for damage. Helmets must be replaced after any significant crash—even if damage is not visible. First aid kits should be updated at least once a year or after items are used. Regularly inspect all your gear for wear, especially before high-mileage outdoor adventures; if you notice weak spots, tears, or any damage, invest in prompt replacements for continued protection. Can I use on-road safety equipment for off-roading? Some essentials overlap, but off-road safety equipment is specifically built for rougher conditions and better protection against environmental hazards. While some equipment—like helmets or basic gloves—have cross-use potential, off-road safety equipment is engineered for much tougher demands, offering protection from impact, weather, and unexpected trail hazards that on-road gear might not withstand. For full protection and the highest level of durability, always choose off-road-specific models optimized for rugged terrain and adventure environments. Key Takeaways: Off-Road Safety Equipment Essentials The right off-road safety equipment can be life-saving Always match your gear to your vehicle and environment Invest in quality brands and maintain your equipment Make safety a priority for every adventure Put your safety first —gear up with the best off-road safety equipment and enjoy every adventure with confidence, knowing you’re protected, prepared, and ready for anything.

07.30.2025

Master Riding Posture Techniques to Ride Like a Pro

Did you know that improper riding posture techniques contribute to over 40% of equestrian injuries? Unlock the secrets to professional-level stability and style by perfecting your riding position from the ground up. Unlocking the Basics: Understanding Riding Posture Techniques for Optimal Performance Mastering riding posture techniques is the foundation for every successful horse rider, regardless of discipline or experience level. In essence, riding posture refers to the precise way you position your body in the saddle to maximize control, communication with your horse, and personal safety. The riding position comprises distinct elements: a balanced seat, aligned spine, level shoulders, supple arms, and secure legs, all working together in harmony. Understanding the body position not only prevents strain on your own back and joints but also ensures that your horse moves in response to clear, subtle cues. Whether you aim to improve your posture in the saddle for dressage, jumping, or trail riding, proper alignment fosters confidence and enables peak performance. Unfortunately, many riders develop habits such as leaning forward or letting shoulders collapse, reducing their control and stability. Recognizing these postural errors is the crucial first step toward riding like a true professional. Definition of riding posture techniques Key elements of effective riding position and body position Why riding posture impacts skill and safety Common postural errors that hinder improvement What You'll Gain from Mastering Riding Posture Techniques Enhanced stability and balance Improved communication with your horse Injury prevention with correct riding and good posture Greater confidence on any terrain The Science Behind Proper Riding Position: Aligning Body Position to the Saddle Good posture in the saddle is grounded in basic biomechanics: the body’s natural alignment, joint stacking, and efficient muscle engagement. A proper riding position ensures the rider’s seat bones are evenly balanced, the pelvis is neutral, and there is a straight line from ear to shoulder, hip, and heel. This alignment helps absorb the horse’s motion, lessening the risk of fatigue or strain in the lower back and upper body. Conversely, poor body position —like slouching, arching the back excessively, or pinching with the knees—disrupts the rider’s center of gravity, making it harder to stay secure or communicate with the horse. Even subtle misalignments, such as collapsed shoulders or uneven weight on seat bones, can affect both your performance and your horse’s comfort. By consistently focusing on correct posture in the saddle , you protect your spine and muscles, enabling longer and more enjoyable rides. Correct vs. Incorrect Riding Posture Body Segment Correct Posture Incorrect Posture Head Aligned with spine, eyes forward Looking down, chin jutted forward Shoulders Relaxed, even, in line with hips Hunched, rounded, or uneven Seat Balanced on both seat bones, pelvis neutral Tipped forward/back, weight shifted to one side Legs Hanging long, relaxed, calf contact Knees gripping, toes out, legs braced Feet Heels down, balls resting in stirrups Toes down, heels high, uneven weight Step-by-Step Guide: Achieving and Maintaining Correct Riding Posture Techniques Setting your foundation: seat, pelvis, and alignment Begin every ride by sitting evenly on your seat bones, feeling both sides of your pelvis connect with the saddle. Keep your spine neutral and avoid arching or rounding your lower back. This creates the strongest link between you and your horse and sets the stage for the ideal riding position. Shoulder and back position for body stability Gently lift your chest and settle your shoulders back, aligning your shoulder blades with your hips for strength and balance. Keep your upper body supple to allow for the horse’s movement, but avoid excessive stiffness in the upper back. Arm and hand placement—controlling with precision Maintain a soft, supple bend in your elbows. Your hands should form a straight line from elbow to the bit, providing clear signals to the horse. Avoid tense, rigid arms or letting your hands stray too high or low. Leg, knee, and foot contact for balance Ensure your knees gently hug the saddle without gripping. Your legs should drape down, heels aligned beneath your hips, providing subtle cues to the horse for movement or correction. Maintaining good posture throughout the ride Continuously check your posture, especially when changing gaits or direction. Use visualizations and rider-specific mental cues to keep your alignment consistent, even as conditions shift. Body Position for Every Rider: Adapting Riding Posture Techniques to Style Western vs. English riding position: Western riders typically sit more deeply and upright with relaxed legs, while English riders maintain a lighter seat with more direct leg contact. Both require an aligned spine and stable core for maintaining balance over different gaits and tasks. Dressage rider fundamentals: Dressage emphasizes harmony and subtle control through a classic upright posture, even seat bones, long legs, and refined hand movements. The dressage rider’s posture becomes the language of communication with the horse, refining every aid and correction. Adjustments for jumping, trail, and endurance riding: Jumping demands a forward hip angle and more weight in the stirrups, while trail or endurance riding often involves subtle position shifts to accommodate varying terrain for prolonged comfort. How to Improve Your Riding with Pro-Level Posture in the Saddle Flexibility and stretching routines to improve your posture: Yoga, dynamic stretching, and targeted lower back and hip openers promote mobility, helping you maintain good posture and avoid tension in the saddle. Balance exercises for riding position: Practice core strength workouts, such as planks and pelvic tilts, to enhance your ability to ride independently of your hands or feet, stabilizing your position in the saddle. Drills to reinforce muscle memory: Hands on hips, riding without stirrups, or balance exercises with arms overhead can imprint proper alignment. Set aside practice sessions focusing solely on position instead of technique or speed. Real-world tips from professional riders: Elite horse riders emphasize mental cues (“shoulders back, heels down”), regular video analysis, and feedback from instructors. These habits accelerate your ability to improve your riding position and maintain good posture over time. "A rider's posture is not just about looking the part—it’s the language through which we communicate with our horse." – Renowned Dressage Rider Identifying and Correcting Common Mistakes in Riding Posture Techniques Leaning forward: how it disrupts correct riding position Many riders unconsciously tip their upper body forward, especially at faster gaits or when nervous. Leaning forward shifts your center of balance away from your seat bones, can lead to gripping with the knees, and reduces the clarity of your aids—undermining both performance and safety. Hunched shoulders and collapsed core Dropping the shoulders and relaxing the core can make your upper body collapse, causing tension through the neck and upper back. This postural error makes it difficult to maintain good posture and can affect how the horse responds to your instructions. Rigid arms and tense hands Stiff arms restrict your ability to absorb the horse’s motion, making your signals abrupt and uncomfortable. Focus on keeping elbows supple and wrists straight, guiding your horse with clear, yet soft, rein aids. Misaligned hip or uneven weight distribution Sitting unevenly—such as sliding more weight onto one seat bone—affects balance and evenness in the saddle. Regularly check your pelvis, ensuring both hips are level for correct riding posture and easier horse movement. Quick posture fixes for lasting results Simple strategies like visualizing a straight line from ear to heel, taking a deep breath to reset your upper body, or asking for feedback from a coach can help immediately improve your riding position. Essential Tools and Technology for Evaluating and Enhancing Riding Posture Mirrors, video analysis, and posture sensors: Arena mirrors and video feedback allow riders to see and correct their posture in real time. Wearable sensors track movement, alerting you to shifts in balance and position. Apps for body position tracking: Mobile apps analyze posture in the saddle using smartphone cameras or sensors, offering instant feedback and long-term progress tracking. Saddle fit and its effect on riding posture: A well-fitted saddle supports optimal alignment, while an ill-fitting one can force incorrect posture and discomfort for both rider and horse. Safety gear and posture aids: Corrective vests, balance pads, and specialized stirrups can ‘remind’ the body of proper positioning as you ride, reinforcing learning and preventing bad habits from settling in. Breakdown of perfect riding position on horseback Demonstration of common corrections Watch champion riders explain their methods Best Practices for Developing and Maintaining Good Posture in the Saddle Daily routines to maintain good body position Mental cues for posture awareness Partner exercises for accountability How to Assess Progress: Metrics for Measuring Improvements in Riding Posture Techniques Posture Improvement Metrics Measurement Area Before Practice After Targeted Practice Balance (seat bone alignment) Uneven, frequent shifting Consistently level, minimal shifting Symmetry (shoulders/hips) One side collapses Both sides even and strong Fatigue Level Tired quickly due to tension More endurance, less lower back discomfort Horse Response Reluctant, slow to respond Easier movement, greater responsiveness People Also Ask How to improve posture while riding? Practice core exercises off the horse, such as planks and balance drills, to develop muscle strength and core stability. Use visual aids like mirrors in the arena or record yourself for self-assessment and correction. Seek regular feedback from an experienced instructor who can spot subtle alignment issues and help you improve your posture in the saddle. What is the correct posture for a rider? An erect spine with a neutral pelvis and balanced seat bones for a solid foundation in the saddle. Relaxed shoulders with straight wrists and elbows bent, allowing for precise communication with the horse. Heels down, aligned with the hips, creating a straight line through the ankles for stability and control. What is the 20% rule in horseback riding? The rider should not exceed 20% of the horse’s body weight, including tack. This limit protects comfort and performance for both horse and rider, reducing the risk of injury or long-term issues. When near the weight limit, it’s especially crucial to maintain good posture and a light, balanced riding position. What are the 4 basics of centered riding? Soft eyes —a relaxed gaze that promotes awareness of your position and the horse’s movement. Breathing correctly to keep your upper body relaxed and responsive. Centering—aligning your posture for balance and control. Building blocks—stacking the body (head, shoulders, hips, heels) for a balanced posture in the saddle. Frequently Asked Questions on Riding Posture Techniques Does posture really affect horse movement? Yes, a rider’s position in the saddle has a huge impact. Balanced body alignment allows the horse to move freely, while poor posture can cause tension or resistance. How can I identify poor posture in pictures? Look for signs such as rounded shoulders, lack of straight line from ear-shoulder-hip-heel, or uneven shoulders and hips. Consistent self-analysis using photos helps spot progress and areas to improve your riding position. Can I improve my riding position at any age? Absolutely! With the right exercises and consistent practice, riders of all ages can improve strength, flexibility, and posture. How does posture training affect long-term health? Regular posture training reduces strain on the lower back and joints and lessens the risk of chronic injury, supporting a longer, more enjoyable riding career. Recap: Transform Your Skills with Pro-Level Riding Posture Techniques Key takeaways for mastering riding posture Commitment to consistent practice for the best riding position A quick reference checklist for daily training Take the First Step: Start Perfecting Your Riding Posture Techniques Today Take action now—make posture practice part of every ride to unlock your full potential in the saddle.

07.30.2025

Horse Riding Equipment You Can’t Ride Without Today

Did you know that over 80% of serious horseback riding injuries could be prevented with proper riding equipment? Whether you’re saddling up for a spirited gallop or perfecting your trot, having the right horse riding equipment isn’t just a luxury—it’s essential. In this eye-opening guide, we cut through the confusion to reveal the absolute essentials you need for modern horse riding . You’ll discover surprising facts, expert choices, and honest reviews that will help you ride smarter and safer. Did You Know? Surprising Facts About Essential Horse Riding Equipment Horse riding has evolved dramatically, with safety advancements and comfort innovations in horse riding equipment at the heart of this progress. For example, studies reveal that riders who consistently wear an ASTM-certified riding helmet are 80% less likely to experience head trauma during a fall. Likewise, high-quality horse tack made from premium leathers and ergonomic designs is proven to prevent chafing and back pain for both horse and rider—boosting both safety and performance in the arena. Even the choice between an English saddle and a Western saddle can impact your riding discipline and success in competition. Today’s riding equipment is designed using data-driven innovations, from shock-absorbing saddle pads to ventilated riding boots , ensuring you and your horse stay comfortable, stylish, and—most importantly—safe while riding. Ignoring these essentials increases the risk of injury and discomfort, potentially turning a joyful ride into a costly experience for you and your horse equip. Why Investing in Quality Horse Riding Equipment Keeps You Safe and Enhances Performance Choosing quality horse equipment isn’t just about aesthetics—your safety and riding success depend on it. Well-crafted riding gear , such as reputable riding boots and helmets, incorporates safety features that meet or exceed industry standards. Durable, properly fitted horse tack reduces the likelihood of gear failure during intense maneuvers, while innovative materials provide increased comfort and breathability. Riders who invest in the best often experience fewer injuries, enjoy better posture, and achieve higher scores at horse shows, all thanks to superior equestrian technology. Additionally, advanced materials in modern horse equip help riders stay safe and keep horses comfortable in challenging weather. Anti-slip saddle pads, moisture-wicking horse blankets , and reinforced horse boots ensure confidence during every stride. With so much at stake, investing in reliable, certified riding equipment is a non-negotiable for every serious equestrian. Essential Horse Riding Equipment for Modern Riders Whether you’re embarking on your first trail ride or preparing for your next horse show, every rider needs a foundation of basic horse riding equipment to ensure safety, comfort, and performance. The minimum kit includes a fitted saddle —either English or Western, depending on your riding style—a quality saddle pad to prevent rubbing and absorb sweat, and durable bridles to maintain effective communication with your horse. Many modern riders also depend on paddock boots or specialized riding boots for stability and grip in the stirrups, while a certified riding helmet remains critical for head protection no matter your skill level. Advancements in horse riding equipment now offer more ergonomic designs that promote better balance and reduce injury for both horse and rider. With materials ranging from genuine leathers to lightweight synthetics, you get the best in breathability and resilience for every riding scenario. Equipping yourself with this selection not only keeps you stylish in the saddle but also demonstrates a commitment to wellness, responsibility, and elevated performance—a must for any serious horse riding enthusiast. Must-Have Horse Equipment: Saddles, Bridles, and More English Saddle Western Saddle Saddle Pad Bridles Paddock Boot Riding Boots Riding Helmet Understanding the Differences: English Saddle vs. Western Saddle in Horse Riding Equipment The debate between the English saddle and Western saddle is central to any discussion on horse riding equipment. While both serve the same basic function, significant differences affect usage, comfort, and discipline suitability. An English saddle is lighter, offering closer contact with the horse for intricate cues, making it ideal for jumping, dressage, and eventing. In contrast, the Western saddle boasts a larger seat, prominent horn, and reinforced design—perfectly suited for long trail rides, ranch work, and the demands of western riding . The choice of saddle heavily influences your riding experience. English saddles are celebrated for their ability to foster subtle communication and support a more upright posture, whereas Western saddles maximize rider comfort during extended sessions and provide added security through their design. Evaluating your primary riding style and intended discipline will help you select the right saddle and ensure that you and your horse remain content and performing at your peak. Comparison of English Saddle & Western Saddle Feature English Saddle Western Saddle Uses Jumping, Dressage, Eventing, Shows Trail Riding, Ranch Work, Western Riding, Rodeo Comfort Lighter, Closer Contact Heavier, Enhanced Comfort for Long Rides Cost Generally Lower to Moderate Moderate to High (premium materials) Ideal Disciplines English Disciplines Western Disciplines Top Riding Boots and Paddock Boot Choices for Horse Riding Equipment A high-quality pair of riding boots or paddock boots is fundamental for any rider, not only for safety but also for comfort and style. Riding boots typically extend to the knee, offering maximum calf protection and a sleek interface with stirrup leathers. They provide crucial support during cross-country events or dressage, shielding legs from chafing and potential injury. For quick rides or barn chores, paddock boots —with their ankle-high design and reinforced toe caps—offer versatile comfort, excellent grip, and flexibility, making them a staple of everyday horse gear. Some of the latest riding boot technologies include moisture-wicking linings, shock-absorbent soles, and zip-up ease for a seamless on-off experience. Modern paddock boots leverage advanced ergonomics to reduce fatigue and accommodate various riding disciplines, from schooling in the arena to working long hours around the stable. Selecting from trusted brands ensures you get footwear that outlasts tough weather, resists barn muck, and enhances the control you have in every stride. How to Select the Right Riding Boots and Paddock Boot for Your Discipline When choosing between riding boots and paddock boots , consider your primary riding discipline. For formal English riding or horse show competitions, tall leather riding boots are required for a polished appearance and superior leg protection. Fields boots with flexible ankles work best for jumping, while dressage boots offer rigid support and sleek lines. If you focus on Western riding , opt for square-toe boots with a defined heel to prevent the foot from slipping through the stirrup and to fit a variety of riding styles. For everyday use and casual rides, paddock boots paired with half chaps can deliver both comfort and affordable versatility. Look for boots with waterproof exteriors, grippy soles for stable work, and adequate ankle support for dismounting. If investing in a single pair, select a boot that balances style and function, fitting your foot comfortably and providing traction across muddy paddocks, dusty arenas, or slick barn aisles. Your safety, control, and enjoyment all rely on this foundational piece of horse riding equipment. Riding Helmet and Other Protective Gear: Keeping Riders Safe Riding helmets and other protective gear are non-negotiable for any rider intent on staying safe. The latest ASTM/SEI-certified helmets feature adjustable fit systems, integrated ventilation, and lightweight construction, ensuring comfort on even the warmest days. A riding helmet reduces the force of impacts, protecting against severe head injuries and concussions—statistics show that most life-threatening equestrian falls involve riders not wearing proper headgear. Combining your helmet with safety vests and reinforced horse boots creates a system of defense, giving you peace of mind every time you mount up. Protective gear isn’t limited to just helmets. Body protectors, safety stirrups, and gloves with grip-enhancing materials can minimize bruises, scrapes, and sprains while maximizing your effectiveness on horseback. Many equestrian disciplines now require specific safety standards for both schooling and shows, emphasizing the growing acknowledgment that no riding session—no matter how casual—is immune to accidents. Stay safe, and always gear up before you ride! "A riding helmet is non-negotiable—it is your best defense against serious injury regardless of skill level." Upgrading Your Tack: Exploring Modern Horse Equip and Riding Gear Options Longevity, comfort, and performance all start with upgrading your horse tack and riding gear . Today’s market offers a variety of horse gear, from ergonomic bridles with anatomical cutouts to saddle pads made from memory foam or sheepskin for ultimate shock absorption. Tech-integrated gear such as GPS saddle attachments, reflective overlays for night riding, and antimicrobial horse blankets are quickly becoming favorites among equestrians who seek both style and substance in their equipment. Investing in high-quality horse equip doesn’t have to break the bank. Many top brands now offer “good-better-best” product levels, ensuring there’s a suitable option for every budget and riding discipline. Focus on gear designed for your level of experience and preferred style—well-maintained, quality products always pay for themselves in peace of mind, longevity, and rider satisfaction. The Importance of High-Quality Horse Tack in Horse Riding Equipment High-quality horse tack is the cornerstone of your relationship with your horse. Superior bridles, halters, stirrups, and girths are engineered for comfort, minimizing rubs, pressure points, and even behavioral resistance. When your gear fits properly and withstands regular use, you communicate more clearly with your horse, enjoy longer, safer rides, and reduce the risk of accidents caused by equipment failure. Moreover, top-notch materials used in modern horse riding equipment extend the life of your tack. From rust-resistant stainless steel bits to reinforced leathers with UV protection, each piece of equipment is designed to withstand rigorous training, unpredictable weather, and the physical demands of a spirited horse. Riding discipline, show competition, and everyday handling all benefit from investing in quality. Selecting the Best Saddle Pad and Horse Blanket for Ultimate Comfort The humble saddle pad and horse blanket play outsized roles in your horse’s health and your riding success. Top-tier saddle pads are crafted for optimal pressure distribution and moisture control, ensuring your horse remains cool and free of hot spots during intense rides. Options include gel-infused, memory foam, or sheepskin-lined pads for maximum shock absorption. Choose the right pad based on your horse’s back shape and your riding discipline—it can prevent saddle sores and extend the life of your saddle. Meanwhile, the horse blanket (or turnout rug) provides protection in all seasons, safeguarding your horse against biting flies, chilly winds, or rain. Lightweight fly sheets are perfect for summer, while thicker, waterproof horse blankets become invaluable in winter. Matching blanket type, fit, and breathability to your horse’s needs ensures top-tier care and performance in both the arena and pasture—a responsibly chosen blanket can even promote a shinier coat and improved overall health. Do You Need a Western Tack or an English Tack Setup? The decision between a western tack and an English tack setup rests largely on your preferred discipline and riding style. Western tack includes a substantial saddle with a horn, ornate bridles, and often a breast collar—ideal for western riding , long trail adventures, and ranch work. The gear is built for security and comfort on lengthy rides, favoring relaxed rein communication. In contrast, English tack is streamlined, with lighter saddles, slimmer stirrup leathers, and refined English bridles suited to jumping, dressage, or event riding, where agility and close contact are paramount. Whichever setup you choose, always ensure that each piece of equipment fits not only your horse but also complements your chosen riding discipline. Riders often discover greater joy and control when matching their tack to their skills and ambitions—making the right choice an investment in your growth as an equestrian. Key Horse Riding Equipment by Discipline: Western Riding vs. English Riding Different riding disciplines call for distinct horse riding equipment setups. Western riding relies on heavier saddles with deeper seats, secure horns, and robust, decorative leatherwork for durability in cattle work and long rides. Core pieces of western tack also include sturdy split reins, western-style horse boots , and bold, functional breast collars that stabilize the saddle and enhance style for competitions like barrel racing and rodeo events. English riding disciplines, including jumping, dressage, and eventing, utilize lighter saddles without horns, thinner bridles, and tightly fitting horse boots or wraps to protect sensitive joints during athletic maneuvers. English tack promotes precision, agility, and clean appearance at every level, from amateur lessons to elite horse show competitions. Choose your tack to match your ambitions, prioritizing safety features and comfort for both you and your horse. Comparing Gear: Western Tack Versus English Tack for Different Styles Western tack is defined by functional ornamentation and sturdy build, supporting riders across rough terrain and lengthy sessions in the saddle. Items like saddle strings, ornate conchos, and sheepskin linings add personality and comfort. Conversely, English tack is minimal, with sleek lines and light leathers designed for quick, sharp cues, perfect for precise jumps and high-level dressage. Ultimately, the best gear for you is that which aligns with your physical build, riding goals, and, of course, your horse’s unique needs and conformation. Explore local tack shops, consult experienced trainers, and experiment with different setups until you find the ideal combination for a harmonious, responsive, and enjoyable ride—regardless of your chosen discipline. Practical Tips for Maintaining Your Horse Riding Equipment Your horse riding equipment represents a significant investment, so protecting its longevity is essential. Begin by cleaning leather tack after every ride with a dedicated saddle soap—remove sweat, oils, and dust that can degrade stitching and cause cracking. Air-dry pads, blankets, and boots after each use to prevent mold and mildew. Regular inspection for wear and tear is critical: swap out broken buckles, frayed reins, or compressed saddle pads to keep safety uncompromised. Store your riding gear in a cool, dry place—temperature-controlled tack rooms work best for leather items. For best results, schedule deep cleans for your entire equip collection twice yearly, checking especially for invisible cracks or hardware corrosion. Applying conditioner restores suppleness and preserves waterproof coatings. Well-maintained gear not only keeps you looking sharp in the arena but also guarantees a safer, more comfortable experience every time you ride. Wipe down saddles, bridles, and boots after each use Inspect for broken or worn hardware weekly Brush off dirt from each piece of equipment once dry Store in a cool, dry, well-ventilated area Condition leather tack monthly to prevent cracking Launder saddle pads and horse blankets regularly How Price Influences Your Choice of Horse Riding Equipment: Budget vs. Premium The market for horse riding equipment spans an impressive range of prices. Entry-level gear prioritizes affordability, perfect for new riders or casual enthusiasts who need to build a complete collection without breaking the bank. Value doesn’t mean cutting corners—many reputable brands offer beginner lines with robust safety features, such as affordable, certified riding helmets and durable synthetic saddles. Premium options, on the other hand, provide enhanced comfort, custom fitting, and advanced materials like hand-stitched leather or molded shock absorbers. This level of horse gear is built for those who ride daily, compete, or simply want the best for themselves and their mounts. While the initial investment is higher, premium equipment often lasts significantly longer and provides a superior riding experience, making it a cost-effective choice for dedicated equestrians over time. Pricing Guide: Entry-Level vs. High-End Horse Riding Equipment Options Equipment Type Entry-Level High-End / Premium Saddle $200 – $700 (synthetic or basic leather) $1,000 – $5,000+ (custom, top-grain leather, advanced technology) Riding Helmet $40 – $150 (basic models) $250 – $600 (premium fit, ventilation, certifications) Riding Boots $60 – $180 (synthetic) $300 – $800 (custom leather, specialized soles) Saddle Pad $20 – $70 (basic cotton/fleece) $120 – $400 (memory foam, gel, sheepskin) Horse Blanket $50 – $180 (standard turnout/fly sheet) $250 – $600+ (technical, waterproof, insulated) Trusted Brands for Essential Horse Riding Equipment in 2024 Choosing reputable brands when selecting horse riding equipment is a smart move, especially with so many options on the market. Trusted names offer consistent quality, innovative design, and excellent customer support, ensuring your horse tack stands up to daily use. Brands that have earned their place in the equestrian world often offer extended warranties, rigorous safety certifications, and a vast selection that accommodates every riding discipline, budget, and style preference. Prioritizing tried-and-true manufacturers is a surefire way to guarantee lasting satisfaction and the best possible experience in the saddle. WeatherBeeta – renowned for ultimate horse blankets and turnout sheets Ariat – leader in riding boots and paddock boots with advanced comfort features Charles Owen – trusted for safety-certified riding helmets Stubben – premium choice for English saddles and bridles Circle Y – gold standard for Western saddles and western tack Ovation – value-focused riding gear for beginners and experienced riders alike Real User Reviews: Why Quality Horse Riding Equipment Makes a Difference Few endorsements are as powerful as those from real riders who put riding equipment to the test every day. Many users report a noticeable improvement in both horse comfort and their own confidence after switching to premium saddles or custom-fitted riding boots . Riders consistently highlight the benefits of breathable horse blankets , which keep their horses happier and healthier through seasonal changes, and praise reliable riding helmets for providing life-saving protection during unexpected mishaps. The overwhelming consensus is clear: investing in quality, certified, and properly-fitted horse gear leads to fewer equipment-related accidents, greater fun, and more successful performances—whether at a local horse show or on the open trail. Don’t settle for less than the best when it comes to horse equipment —your rides will thank you for years to come. "Switching to a premium saddle completely changed my comfort and my horse’s performance." People Also Ask What equipment is used in horse riding? A wide range of horse riding equipment is essential for every discipline, including saddles (English or Western), bridles, saddle pads, riding helmets, riding boots, and protective gear like horse boots and horse blankets. Each piece serves a unique function, from comfort and communication to safety and hygiene, forming the backbone of every riding session. Detailed Answer: Overview of the Main Horse Riding Equipment Used by Riders The main components of riding equipment include a well-fitted saddle (English or Western), a supportive saddle pad for shock absorption, bridles with appropriate bits or reins for guiding the horse, and a certified riding helmet for head protection. Riders also need stable riding boots for grip, gloves, and seasonally-appropriate horse blankets or fly sheets for their horse’s comfort and health. What does every horse rider need? At a minimum, every horse rider needs a properly fitted saddle, bridle, riding boots, riding helmet, and safety gear tailored to their riding discipline. For optimal comfort and horse welfare, add a high-quality saddle pad and horse blanket. These essentials help keep both rider and horse safe, coordinated, and ready for any riding adventure. Detailed Answer: Absolute Essentials for All Riders in Horse Riding Regardless of experience or discipline, absolute riding essentials are: a shaped, well-adjusted saddle; a durable bridle; well-padded saddle pad; certified riding helmet; sturdy boots with a defined heel; and a weather-appropriate horse blanket or fly sheet. These basics form the starting point for safety and success in any equestrian pursuit. What is the 20% rule in horseback riding? The “20% rule” in horseback riding refers to the safe load limit a horse can carry—no more than 20% of its own body weight, which includes both the rider and all tack. This guideline protects the horse from strain, injury, and long-term health issues, ensuring a more enjoyable and sustainable riding relationship. Detailed Answer: The 20% Rule and Its Impact on Safe Horse Riding Veterinarians and industry experts recommend that neither the rider nor total horse equip should exceed 20% of the horse’s weight. For example, a 1,000-pound horse should carry no more than 200 pounds, including saddle, pads, and accessories. Staying within this limit helps maintain the horse’s physical well-being and performance longevity. What tools do you need for a horse? Every rider needs a complete grooming kit (brushes, hoof pick, mane comb), well-maintained tack (saddle, bridle, saddle pads), and protective horse boots or leg wraps. Having fly sheets, waterproof horse blankets, and a basic first-aid kit rounds out the tools needed to keep both rider and horse safe, healthy, and show-ready. Detailed Answer: Grooming, Tack, and Safety Tools Included in Horse Equip Core horse equip toolkits combine grooming supplies—such as curry combs, dandy brushes, and hoof tools—with must-have riding tack: saddles, bridles, saddle pads, riding helmets, and boots. Additional safety essentials include bandages, fly sheets for pest protection, and seasonal horse blankets, keeping every ride as safe and comfortable as possible. Frequently Asked Questions About Horse Riding Equipment How often should you replace your horse riding equipment? It’s recommended to replace helmets every five years or after any significant impact, and inspect all horse tack—such as saddles and bridles—monthly for signs of wear. Replace any piece of equipment that’s showing cracks, frays, or compromised safety features. Saddle pads and horse blankets should be refreshed yearly, especially after heavy use or frequent washing. How do you clean and store horse gear effectively? Always wipe down leather after use, use non-toxic cleaners for synthetic or fabric gear, and air dry before storage to prevent mold. Store saddles, bridles, and pads off the ground in a ventilated, dry space, avoiding direct sunlight or damp areas that accelerate deterioration. Routine care preserves both function and appearance, keeping your horse riding equipment reliable for years. Key Insights on Choosing the Right Horse Riding Equipment for Your Needs When shopping for horse riding equipment , fit, durability, and certification should always guide your choices. A well-fitted saddle and helmet drastically reduce injury risk; durable materials guarantee longevity, and certified safety features provide unmatched peace of mind. Factor in your rider skill level, riding style, horse conformation, and maintenance preferences to find the best combination for safe, enjoyable riding—regardless of discipline or experience. Ensure perfect fit for both you and your horse Check for up-to-date safety certifications Choose materials and brands trusted by professionals Balance cost with durability and comfort features Match tack to your riding discipline and skill level Prioritize adjustability and ease of cleaning Get the Best Horse Riding Equipment Today for a Safer and More Enjoyable Ride Unleash your full equestrian potential—shop trusted brands and prioritize quality, certified horse riding equipment for peace of mind, comfort, and outstanding rides, every time you saddle up!

Terms of Service

Privacy Policy

Core Modal Title

Sorry, no results found

You Might Find These Articles Interesting

T
Please Check Your Email
We Will Be Following Up Shortly
*
*
*