Add Row
Add Element
Icon for Rugged Trails Network showcasing adventure and outdoor exploration.
update
Rugged Trails Network
update
Add Element
  • Home
  • Categories
    • Vehicle Reviews
    • Adventure Plans
    • Expert Talks
    • Riding Tips
    • Event Coverage
    • Maintenance Guides
    • Tech Innovations
  • Featured Business Profiles
  • All Posts
  • Vehicle Reviews
  • Adventure Plans
  • Expert Talks
  • Riding Tips
  • Event Coverage
  • Maintenance Guides
  • Tech Innovations
  • Featured Business Profiles
July 31.2025
1 Minute Read

Recreational Off-Roading Tips for Maximum Adventure

Ready to transform your outdoor escapades and off-road trail rides into unforgettable adventures? Did you know over 65% of off-road recovery incidents happen within the first mile from the trailhead? That’s because preparation —not just bravado—sets experts apart from beginners. In this comprehensive guide, you’ll gain expert insight on recreational off-roading tips that go beyond the basics and keep every adventure thrilling, safe, and rewarding. From maximizing traction to handling water fording and always having the right recovery gear, these tips help ensure you end every ride home safe and ready for your next challenge. Let’s gear up!

Unleashing the Thrill: Surprising Facts About Recreational Off-Roading Tips

"Did you know over 65% of off-road recovery incidents happen within the first mile from the trailhead? Preparation is the real key to adventure."

Adventurous off-road vehicle traversing rocky terrain with driver and co-driver smiling, representing recreational off-roading tips

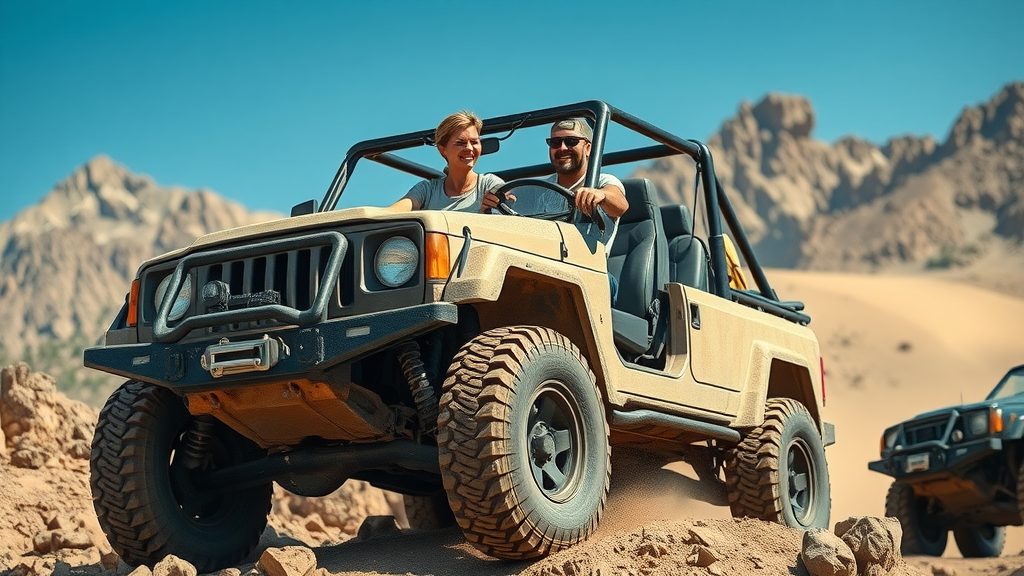
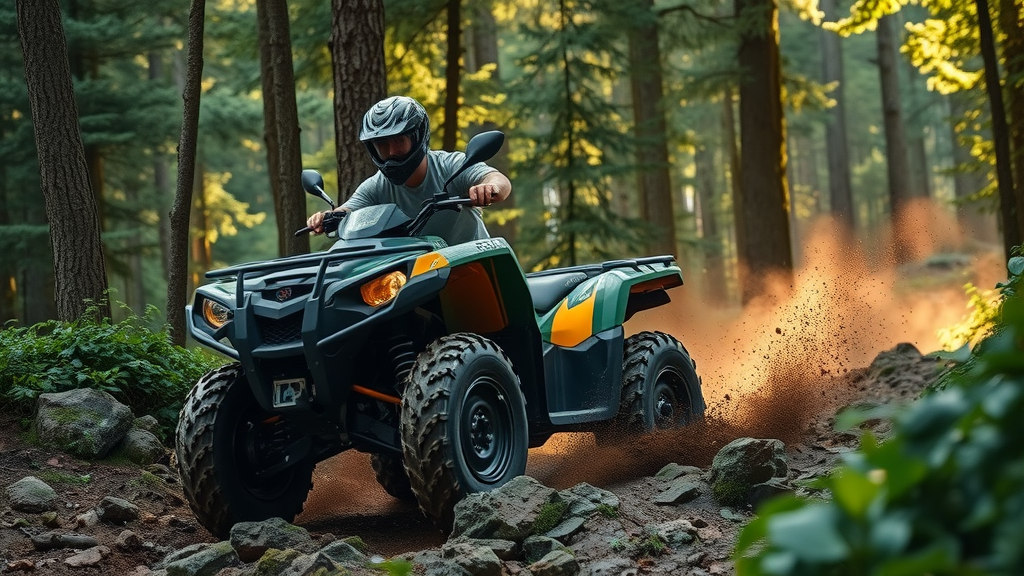
Off-roading offers the rush of uncharted exploration, but few enthusiasts realize just how close to the trailhead most incidents occur—often minutes after rolling out. That’s why paying close attention to safety rules , proper equipment, and strategic planning is a must for every trail ride. Recreational off-roading isn’t just about big wheels or powerful engines; it’s about using proven techniques like seat belt use, communication device readiness, and proper group spacing, all of which boost your chances of coming back home safe. With the right tips, you’ll not only conquer new terrain but also outsmart the most common pitfalls that catch even experienced drivers off guard.

What You'll Learn From These Recreational Off-Roading Tips

  • Understanding essential safety rules for maximum adventure
  • Best practices for traction control, tire pressure, and locking differential
  • How to navigate water fording and prepare recovery gear
  • Must-have equipment: air compressor, first aid kit, fire extinguisher
  • Advanced strategies to avoid common off-road mistakes

Mastering Safety Rules: The Foundation of All Recreational Off-Roading Tips

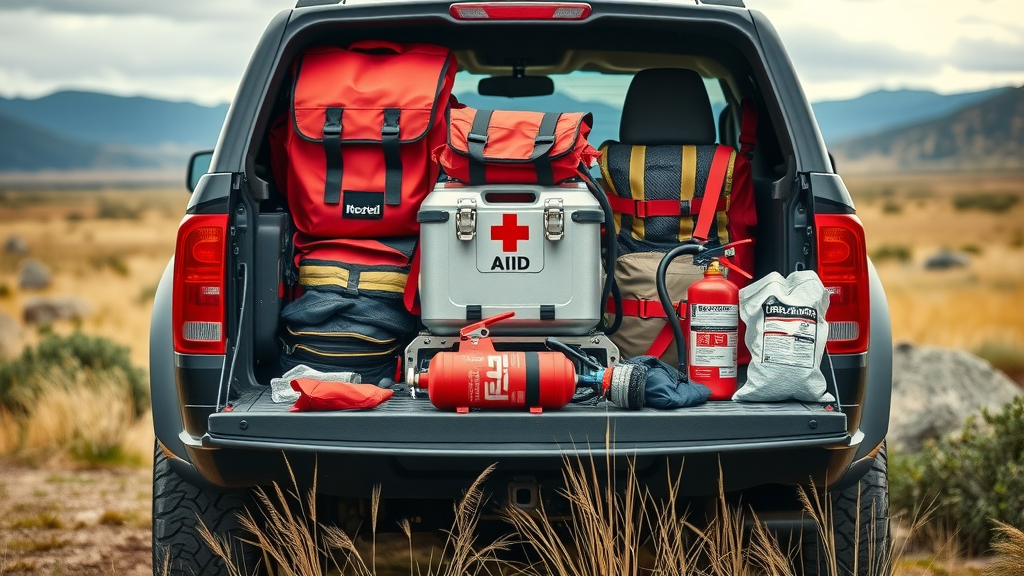
Every thrilling adventure starts with strict adherence to safety rules —the cornerstone of reliable recreational off-roading tips. Proper safety preparation ensures that fun never gets overshadowed by unexpected mishaps. A robust aid kit , fire extinguisher, and quality recovery gear should top your checklist before every journey, as these essentials can make the difference in emergencies. Don’t underestimate the simple act of briefing everyone on your trip plan and confirming communication protocols. Clear communication isn’t just a good idea —it’s essential for tackling challenging dirt road or sand dune environments safely.

Appoint a trip leader with off-road knowledge to coordinate the group, assign roles, and keep everyone aware of the plan. Share your intended route with a trusted contact outside the group, boosting your chances of getting help if required. Experienced off-roaders know the value of creating a communication chain, especially if something goes sideways in deep mud, low visibility, or remote locations. By treating pre-trip safety as non-negotiable, you maximize confidence and elevate your driving experience.

Pre-Trip Inspection and Safety Essentials

  • Check first aid kit, fire extinguisher, and recovery gear before every journey
  • Prepare a plan and share your route
  • Designate a trip leader and clear communication protocol

Well-equipped off-road vehicle with safety gear checked, pre-trip inspection for recreational off-roading

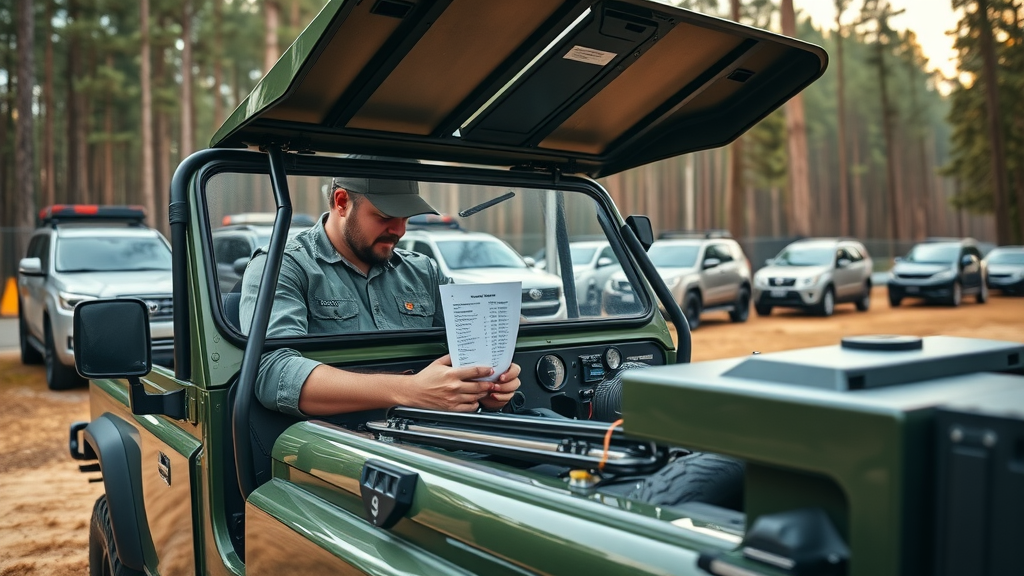
Failure to inspect your first aid kit , fire extinguisher, and recovery gear is one of the most common mistakes—one easily avoided with a simple checklist. Check contents, expiration dates, and readiness before hitting the trail. Communication devices like a satellite phone or a radio should be charged, tested, and within reach for every group member. Route planning isn’t just about choosing the most scenic trail; it’s about mapping out fuel stops, recognizing potential hazards, and informing someone back home of your estimated return. This level of preparation transforms every trip from a leap of faith into a calculated, safe journey.

On-the-Trail Protocols and Emergency Response

  • Spotting techniques and signaling
  • Maintaining group spacing
  • Knowing when to stop and seek help

On the trail, use proven spotting and hand signaling techniques to guide drivers over obstacles or through tight turns, boosting overall group safety. Maintain clear, consistent group spacing to avoid collisions or the domino effect in sudden braking situations. Watch for signs of vehicles struggling—whether it’s the smell of burnt clutch, a flat tire, or an overheated engine—and don’t hesitate to stop and seek help if things seem off. In emergencies, remember: keeping your cool, working as a team with your recovery gear, and following a predefined plan increases your chances of getting everyone home safe and sound.

Tire Pressure: The Secret to Effective Recreational Off-Roading Tips

One of the simplest yet most critical recreational off-roading tips is learning how tire pressure affects performance. Lowering your tire pressure increases your tire’s tread footprint, enhancing grip and traction—especially on soft or uneven terrain. This secret is heavily relied upon by seasoned pros to avoid getting stuck in sand dunes, deep mud, or rocky ground. But too low pressure risks a flat tire or bead separation, so always follow recommended values. An onboard air compressor lets you adjust tire pressure to match each environment and reinflate tires before returning to paved roads. Remember, tire pressure is a dynamic tool, not a one-size-fits-all number—adapt it with confidence to maximize ground clearance and tread pattern contact where it matters most.

How Proper Tire Pressure Maximizes Traction

Terrain Type Recommended Tire Pressure (PSI)
Sand 12-16
Mud 15-20
Rocks 16-22
General Trail 20-26

On sand, dropping to 12-16 PSI allows for improved flotation—essential to avoid bogging down on a sandy trail or dune. In mud, 15-20 PSI widens your tire’s grip, reducing the likelihood of getting stuck. For rocky climbs, aim for 16-22 PSI—low enough to contour over obstacles but not so low as to risk a flat. When returning to the main road, always reinflate to manufacturer specifications for safety and tire longevity. It’s wise to bring an air compressor and regularly check tire pressure with a reliable gauge.

Choosing Between Air Compressor Types

Off-road tire close-up, driver using portable air compressor, tire pressure adjustment for off-roading tips

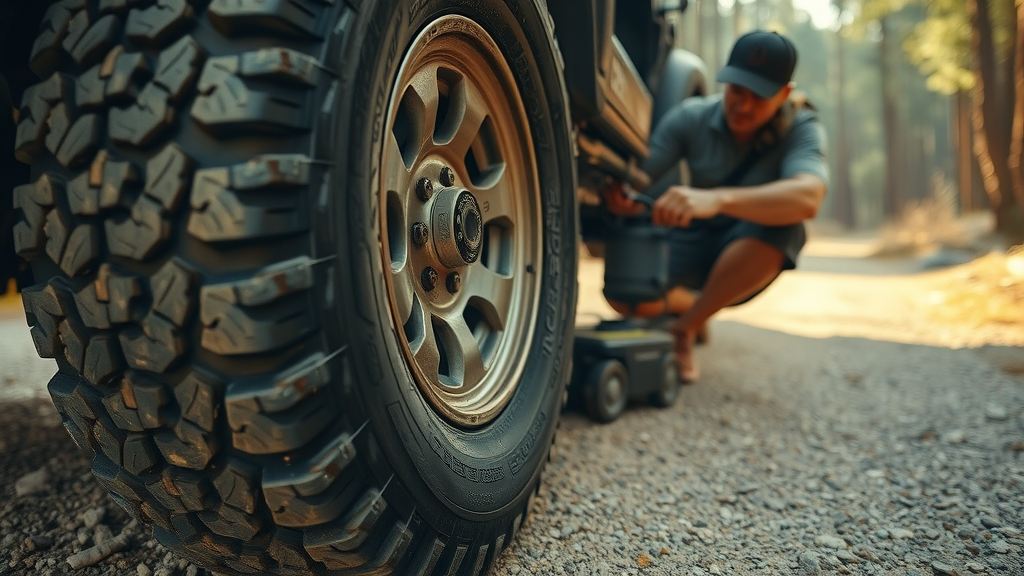
There are two main air compressor options: portable and onboard. Portable compressors are compact, cost-effective, and easy to move between vehicles—a good idea for occasional off-roaders, dirt bike riders, or 4x4 clubs. However, portable models often inflate tires more slowly and may require periodic cooldowns. Onboard compressors are permanently installed and wired to your vehicle, offering faster inflation, consistent performance, and convenient integration for air lockers or other pneumatic tools. Choose based on how often you off-road, the typical group size, and whether you value portability or performance. In all cases, regular compressor maintenance—checking hoses, connections, and power cables—ensures it’s ready when you need it most.

Leveraging Traction Control and Locking Differential: Next-Level Recreational Off-Roading Tips

Mastering traction control and the use of a locking differential elevates your driving experience, especially when tackling unpredictable terrain. Traction control systems detect wheel slip and apply brakes or reduce power to help you climb and descend safely on slick surfaces or steep hills. But there are times—like deep mud or jagged rocks—when it’s better to disable traction control temporarily, letting your own skills and the vehicle’s mechanical grip do the work. A locking differential sends equal power to both wheels on an axle, ensuring maximum forward motion when one side loses traction. Knowing when to engage or disengage these features is a hallmark of savvy off-road driving and prevents getting bogged down in tough spots.

Experiment in safe environments to understand how your specific traction control and locking differential systems behave. Read your manual, test these features on dirt roads and practice using low gear and the transfer case for maximum control. Many modern SUVs and trucks offer selectable traction and diff-lock settings—use these tools wisely to handle sand dunes, rocky ledges, or mud pits with confidence.

Understanding Traction Control Systems

  • How traction control supports safe climbing and descent
  • When and how to disable for specific terrain

Traction control is designed to prevent wheel spin as you climb or descend, which is especially useful when the surface is slick or loose. In sand or deep mud situations, momentarily disabling this system can allow more wheel spin for momentum, helping you avoid getting stuck. However, always re-enable traction control on descents or when the trail surface becomes unpredictable—it’s your safety net for challenging conditions. Recognize the distinctive dashboard lights and learn the reset process, so you can adapt settings mid-ride as trail conditions change.

When to Use a Locking Differential

SUV dashboard close-up, driver activating traction control and locking differential for off-roading

Your vehicle’s locking differential is a powerful tool when tackling uneven terrain where one wheel may hang in the air or lose grip. Engage the locker in slow, technical situations—never at high speeds or on paved roads. For mud pits, rocky steps, or steep ledges, engaging the diff lock sends force to both wheels equally, letting you power through when an open diff would leave you spinning. Once past the obstacle, disengage to avoid drivetrain stress. Practice in controlled settings and learn to anticipate obstacles, so using the diff lock becomes second nature rather than a panicked last resort.

Water Fording Techniques and Recreational Off-Roading Tips for Wet Environments

Coaxing your SUV or dirt bike through streams, creeks, or floods is exhilarating if done right—dangerous if not. The golden rule of water fording is preparation. Assess every obstacle for safe depth, substrate stability, and entry/exit points. Getting it wrong can leave you stranded or cause costly engine damage. Armed with the right knowledge, tackling wet environments becomes an adventure highlight—not a cautionary tale. Never rush a crossing without first checking water height versus your vehicle’s air intake and ensuring your recovery gear, like a snatch strap and tow strap, is within reach.

A snorkel, sealed electronics, and high ground clearance are vital pieces of special equipment for water fording. When in doubt, turn back—no thrill is worth the risk to your rig or safety.

Assessing Depth and Streambed

  • Check flow, depth, and entry/exit points
  • Use a stick or wade in first if safe

Before entering water, stop and inspect the crossing—both visually and physically. Use a stick and measure the depth along your intended path, confirm that the flow rate isn’t excessive, and examine the streambed for soft spots or hidden rocks. When safe, walk (never ride or drive) through the crossing to confirm consistent depth and stable footing. Plan your exit; many vehicles bog down at the bank due to steep or muddy angles. If everything checks out and you’re confident in your recovery gear and skills, proceed slowly in low gear, keeping a steady bow wave ahead of your vehicle’s front wheels.

Vehicle Preparation for Water Fording

SUV with snorkel for water fording, carefully crossing river, essential off-roading tip

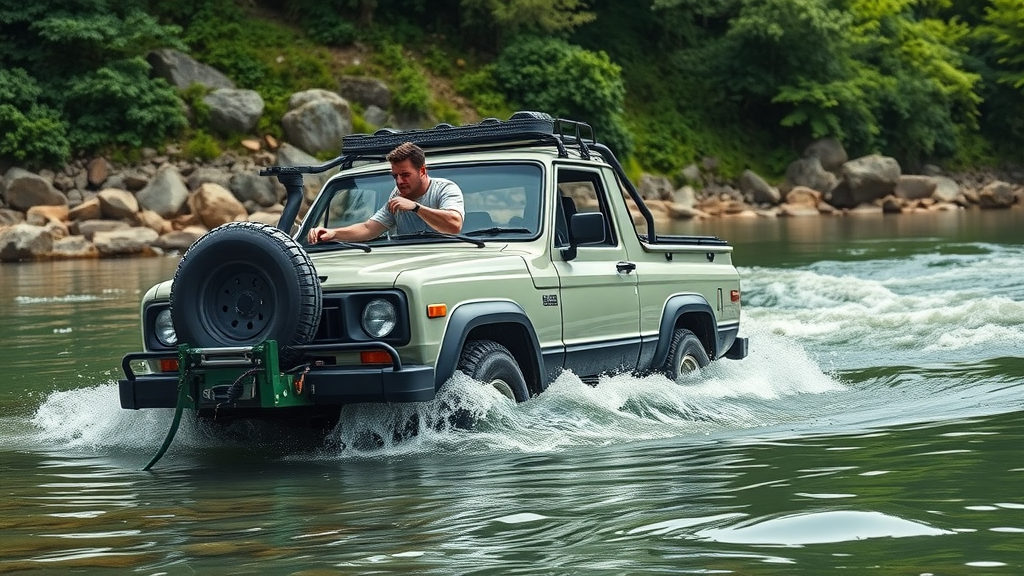
Outfitting your rig for wet crossings isn’t just for show—it’s a critical part of responsible off-roading. Install a snorkel to raise your air intake above expected water levels, protecting your engine from hydrolock. Ensure all plugs, electrical connectors, and sensitive electronics are waterproofed or sealed. Routine checks before and after every crossing extend your vehicle’s life and ensure electronics don’t fail at the worst possible moment. Keep a tow strap or snatch strap coiled and accessible, and brief your co-driver on quick exit plans if water levels unexpectedly rise.

Recovery Gear: Recreational Off-Roading Tips for Every Situation

Every well-prepared trail ride requires a tailored supply of recovery gear . Getting stuck—even for experienced drivers—is inevitable when exploring diverse terrain. The best off-roaders never leave home without the gear to help themselves or a buddy out of trouble, whether it’s a buried wheel or a high-centered chassis. Quality snatch straps, tow straps, and a winch rated for your vehicle’s weight can be the difference between a minor hiccup and a long, expensive wait for rescue. Use traction boards for sand, mud, or snow, and always know each tool’s strengths and safe operating limits. Off-road recovery isn’t just about tools—it’s about planning, teamwork, and solid know-how.

Top Recovery Tools Every Off-Roader Must Carry

  • Tow straps and shackles
  • Winch with rated capacity
  • Traction boards
  • Hi-lift jack

Equip your gear stash with a good-quality snatch strap and tow strap for kinetic or static pulls. Shackles, preferably soft shackles for safety, are essential for secure connections. If you expect deep mud, traction boards should always be handy for extra grip under spinning tires. A hi-lift jack proves invaluable in field tire changes or for lifting the vehicle to clear rocks or roots. Make sure everyone in your group knows how to safely use each recovery tool—staying safe means never guessing when the pressure’s on.

Efficient Off-Road Recovery: Step-By-Step

If you get bogged down, don’t panic. Start by gently rocking the vehicle to assess if self-recovery is possible. Place traction boards under the drive wheels and use a controlled throttle to climb out slowly. If stuck deeper, employ a snatch strap or winch, ensuring everyone stands clear before tensioning the lines. Always use rated recovery points—never attach to bumpers or tie-down loops, which can fail catastrophically. Communicate clearly with all helpers before and during the pull. Following this methodical approach prevents escalation into injury or vehicle damage, and ensures that every off-roading adventure ends with a confident, safe recovery.

Preparing an Air Compressor, First Aid Kit, and Fire Extinguisher for Safe Recreational Off-Roading

Don’t overlook the fundamental trio: a well-equipped first aid kit , reliable air compressor , and accessible fire extinguisher . Each item is a cornerstone of safe off-roading, giving you or your companions the ability to respond effectively in emergencies, from treating injuries to re-inflating a flat tire or swiftly containing a fire. Make pre-trip inspection a ritual—review these tools before every outing, and encourage your friends to do the same.

Essential First Aid Kit Checklist

  • Bandages, antiseptics, splints, snakebite kit, medications

A comprehensive aid kit should include assorted bandages, antiseptic wipes, medical tape, splints for immobilization, a snakebite kit suitable for your region, and any personal or prescription medications your group needs. Organize supplies for quick access and check expiration dates regularly. Keep the kit visible in your cab or trunk, never buried beneath other gear—when accidents happen, every second counts. Many experienced trail riders recommend keeping a backup kit for larger groups or multi-day trips.

Fire Extinguisher Types and Placement

In off-roading, a fire extinguisher isn’t optional, especially on trails where grass or leaves can ignite against hot exhaust. Opt for an ABC-rated extinguisher capable of handling electrical, liquid, and solid fuel fires. Install it within arm’s reach of the driver seat and brief your group on its use—it could make the critical difference in a fast-moving fire. Check the charge level and replace or recharge after any use.

Air Compressor Maintenance and Use Cases

Organized safety gear including air compressor, first aid kit, and fire extinguisher on off-road adventure

Maintain your air compressor by inspecting power cables, pressure hoses, and fittings after every trip. Clean filters and ensure it’s stored dry to prevent rust or corrosion, especially after water fording. Use the compressor not only to adjust tire pressure but also to blow out dust from key engine components or inflate toys and gear at camp. Portability and reliability should be your top purchasing criteria, as a dependable compressor enhances both safety and comfort on every adventure.

Expert Quote: The Importance of Planning in Recreational Off-Roading

"The best off-roaders never stray far from their safety routines. Preparation, knowledge, and respecting limits always triumph over bravado." – Veteran Trail Guide

People Also Ask: What is a common mistake during off-road recovery?

A common mistake in off-road recovery is rushing the process—such as attaching a snatch strap to an unsafe point or failing to clear bystanders before a recovery pull. Always use rated recovery gear and proper anchor points, and communicate clearly to minimize risk of injury or damage.

People Also Ask: Why is off-roading illegal?

Off-roading is illegal in some areas due to environmental concerns, safety hazards, and property boundaries. Driving vehicles off designated trails can harm wildlife, erode soil, or disrupt fragile habitats. Always check local regulations before setting out and respect signage to protect access for everyone.

People Also Ask: What should I air down to for off-roading?

Recommended tire pressure varies by terrain: for most sand, lower to 12-16 PSI; for mud, 15-20 PSI; for rocks, 16-22 PSI; and for general trails, 20-26 PSI. Always re-inflate your tires to street pressure before returning to paved roads to ensure safety and minimize tire wear.

People Also Ask: Is AWD or 4WD better for off-road?

While both AWD and 4WD offer improved traction, 4WD (four-wheel drive) systems with low-range gearing and locking differentials are typically better for challenging off-road situations. AWD is generally more suitable for light dirt roads or gravel. Always match your vehicle’s capabilities to the terrain and plan accordingly.

Essential FAQs for Recreational Off-Roading Tips

  • What should I check before hitting the trail?
    Inspect fluid levels, tire pressure, safety gear (first aid kit, fire extinguisher), and communication devices. Confirm your route and weather forecast as well.
  • Can I use street tires for off-roading?
    While possible on mild dirt roads, dedicated off-road tires with aggressive tread patterns and reinforced sidewalls are highly recommended for traction, durability, and safety.
  • How do I stay prepared for sudden weather changes?
    Carry extra clothing, waterproof gear, and check weather updates before and during your trip. Keep your aid kit handy, and ensure your vehicle is equipped for rain, mud, or snow.
  • What are signs an obstacle is impassable?
    Water deeper than your vehicle’s air intake, swift flows, heavily rutted mud, or steep, slippery rocks are red flags. When in doubt, back out or seek an alternate route.

Quick List: Top 5 Recreational Off-Roading Tips for Maximum Adventure

  1. Inspect safety gear and ensure everyone's briefed on safety rules
  2. Run the correct tire pressure and carry an air compressor
  3. Understand your traction control and locking differential settings
  4. Bring recovery gear for the terrain you'll encounter
  5. Never underestimate the importance of planning and communication

Maximize Your Excitement and Safety: Take On Your Next Recreational Off-Roading Adventure

Pack your safety gear, check your tire pressure, review the rules, and hit the trail ready—your next thrilling adventure is waiting, and you’ll conquer it with skill and confidence!

Riding Tips

1 Views

0 Comments

Write A Comment

*
*
Related Posts All Posts
07.31.2025

Trail Riding Tips That Keep You Safe and Enjoy the Ride

Ever wondered why some riders seem to glide through the trails with ease, while others struggle with every twist and turn? Imagine transforming every trail ride into a safe, stress-free adventure—for both you and your equine companion. In this comprehensive guide, you’ll uncover essential trail riding tips that not only keep you safe but make every moment on the trail unforgettable. Why trail riding tips are crucial, even for experienced riders Key preparation steps to ensure safety and enjoyment How to select the best gear and paths for your trail rides Expert answers to common trail riding questions How to manage challenges, wildlife, and group coordination on the trail What Makes Trail Riding Tips Essential for Every Rider? Trail riding offers a connection with nature and your horse that arena work simply cannot match. Yet, every open space brings unpredictable elements—sudden wildlife, changes in footing, shifting weather, or even a timid rider experiencing nerves. That’s why trail riding tips matter. Understanding these basics can mean the difference between a challenging outing and a memorable, safe adventure. Proper trail riding isn’t just about how well you ride a horse, but how prepared you are for the ride itself. Preparation—such as knowing your route, checking your gear, and reading your horse’s body language—translates to improved safety, comfort, and confidence. These riding tips are rooted in experience, focusing on respect for your horse, the environment, and your riding partners on every trail. Unlike a controlled arena setting, trail riding presents unique risks and rewards. The varied terrain challenges both horse and rider, demanding an extra layer of attention and adaptability. You’ll soon discover that trail riding tips are not just optional advice, but a set of basic principles for anyone serious about enjoying the journey, riding safely through space preserves and open space, and making the most of every trail riding adventure. Understand the importance of trail riding tips for safety Discover how riding tips improve your experience Uncover why proper preparation matters Examine key differences between trail riding and regular horseback riding Key Trail Riding Tips for a Safe and Memorable Trail Ride The foundation of every enjoyable trail ride is a blend of preparation, attention to detail, and respect for your horse and the environment. Whether you are an experienced rider seeking new challenges or just beginning your first ride, the right riding tips will guide your journey. From checking safety gear to ensuring you move forward with confidence, these strategies help you tackle the great outdoors, embrace long distances, and ride expeditions with assurance. Riding outdoors often means handling unpredictable elements and learning to adjust to things as they come—be it a sudden road riding segment, a stretch in open space preserves, or encountering wildlife on the trail. By mastering a few core trail riding tips , you’ll equip yourself to trail ride safely, support your equine companion, and enjoy the ride to the fullest. Regularly following these riding tips is not about rigid rules, but about developing habits that keep you and your horse secure and happy. Consistency, mindfulness, and respect should guide every aspect of your time on the trail. Let’s dive into essential horseback riding tips that prep both new and seasoned riders for an exceptional day outdoors. Horseback Riding Tips for Trail Riding Beginners Start slow on your first ride: Ease into trail riding by beginning with short, less challenging paths to build both your confidence and that of your horse. This helps avoid overwhelming a timid rider or an inexperienced horse, allowing both to acclimate to the natural environment gradually. Assess your comfort and balance: Trail terrain can test your balance differently than arena work. Pay attention to your posture and your horse’s responses, adjusting as needed to remain secure while still providing firm yet gentle communication. Communicate with your horse: Use clear body language and gentle rein cues. Squeezing with your legs softly helps direct your horse, while consistent cues reassure them during uncertain moments and surprises on the trail. Recognize signs of nervousness: Both rider and horse can feel anxiety. Be mindful of shallow breaths, tense muscles, or distracted behavior—offer a calm leadership style and take breaks to regain composure if needed. Must-Know Riding Tips Before You Hit the Trail Check your tack before every ride: Ensuring your saddle, bridle, girth, and stirrups are secure minimizes the chance of a dangerous mishap. A few moments of attention can prevent hours of regret. Wear appropriate safety gear: Helmets, protective boots, and safety vests are not just for beginners—they are essential for any terrain, especially when facing unpredictable conditions. Bring essential supplies: Never venture onto a trail without enough water, a first-aid kit, and necessary items for both you and your horse. In open space where access to help may be delayed, preparedness is your best friend in case emergencies arise. Familiarize yourself with the trail map: Getting lost is easier than you think when riding in extensive space preserves or complex trail systems. Always know your route, expected ride time, and landmarks along the way. Essential Trail Riding Gear Purpose Helmet Head protection Trail Map Navigation First-aid kit Emergency care Water Bottle Hydration Proper Boots Safety and comfort “Great trail riding is built on preparation, calm leadership, and respect for your horse and environment.” Preparing Your Horse and Yourself for a Successful Trail Ride Preparation is as much about shaping your horse’s confidence as it is about picking the right gear. Trail riding asks riders to respect their equine companions by ensuring both physical and mental readiness. A well-prepared horse will respond confidently to new environments, weather, and obstacles, providing you with a safer, more enjoyable ride. Successful trail rides are grounded in these basic principles—practice, patience, and learning from each new challenge. Your own mindset and body language set the tone for your equine partner. If you’re tense or worried, your horse will pick up on those cues quickly. Approach every ride with patience, positivity, and a willingness to listen to your horse. Building a rapport and trust makes long distances, road riding segments, and even group rides feel more comfortable and secure for everyone involved. Learning how to work as a team means preparing for more than just the ride itself—anticipate how your horse might react to different circumstances. Get used to trailering your horse, handling them calmly in unfamiliar settings, and knowing when to offer extra support and reassurance. It’s not just about making it through a trail ride safely, but about strengthening your partnership along the way. Steps to Get Your Horse Comfortable with Trail Riding Gradually introduce new environments: Instead of heading straight into the backcountry, expose your horse to open space or quiet park trails, increasing difficulty as confidence grows. Practice riding tips in various settings: Ride in different weather, terrain, and with other horses. This flexibility helps your horse—especially timid riders—handle trail expeditions, road riding, and even distractions like wildlife or hikers. Reward calm behavior on new trails: Use treats, soothing voices, or gentle pats to reinforce positive reactions. This builds trust and makes it more likely your horse will move forward confidently on future rides. Schedule regular short trail rides: Frequent, low-pressure outings help both you and your equine companion relax, reduce stress, and develop a solid foundation for longer, more challenging trails. How to Choose the Right Trail Riding Paths Assess trail difficulty and length: Not every trail ride is suitable for every horse or rider. Start easy and progress as you gain experience. Look for ranger ridge recommendations: Trails suggested by rangers are often maintained, safe, and suited to your skill level. Don’t hesitate to ask local experts to guide your selection. Be aware of weather conditions: Rain, heat stress, or early sunset can all increase risk. Check local forecasts before heading out, and avoid challenging routes if conditions aren’t ideal for a safe ride. Plan based on your and your horse’s experience: Match the trail’s level with your riding and your horse’s conditioning. As your skills grow, so can the complexity of your chosen trails—always keeping safety and enjoyment top of mind. Equipment and Gear: Best Riding Tips for a Safe Trail Experience One of the basic principles of safe trail riding is having the right equipment for both you and your horse. The right gear keeps you protected through every twist and turn, be it unexpected road riding or mastering rugged ranger ridge trails. Think of your gear as an extension of your preparation—it’s what stands between a successful outing and unnecessary risks. Horseback riding tips often begin with essentials like helmets and boots, but don’t overlook the value of a well-stocked first-aid kit, a sturdy breakaway halter, and weather-appropriate clothing. Comfort and security go hand in hand when tackling long distances or facing unpredictable weather. Never underestimate how much easier a ride feels when you’re properly equipped—or how much stress you’ll save your horse when saddles, packs, and gear fit perfectly. Before venturing out, double-check your packing list. In open space preserves or remote trails, it could be hours before help arrives in an emergency. Being thorough with your gear checklist not only boosts your confidence but ensures that you’re ready for whatever the trail throws your way. Top Recommendations for Trail Riding Safety Gear Wear an ASTM/SEI-certified helmet: This remains your best defense against head injuries, regardless of age or riding proficiency. Use a breakaway halter: Protects your horse in case they get caught on a branch or fence. Safety comes before convenience every time. Select sturdy, comfortable boots: Good boots support your ankles during long distances and prevent slips when dismounting or walking your horse on rough ground. Carry a multi-purpose knife: Useful for everything from fixing tack to handling emergencies on the trail, making it a must-have in every rider’s kit. Packing List: Essentials for a Day Out on the Trail Hydration supplies: Bring enough water for both you and your horse—heat stress can occur quickly, especially on warm days or during strenuous rides. First-aid kit for horse and rider: Accidents happen, so carry basic medical supplies, including bandages, antiseptics, and hoof care items. Map or GPS device: Even in familiar areas, having clear navigation tools prevents you from getting lost, especially if you encounter unexpected trail closures or need to reroute. Protective sunscreen and bug spray: Prevent sunburn and insect bites; comfort and safety go hand in hand during any outdoor adventure. Advanced Horseback Riding Tips: Handling Road Riding, Obstacles, and Wildlife Road riding and dealing with obstacles are realities on many trails, presenting unique challenges for both horses and riders. The key is to anticipate potential issues and know how to react. Whether crossing a busy road, fording a stream, or guiding your mount past a fallen log, your calm leadership can help your horse move forward confidently in any situation. Road riding can expose your horse to vehicles, bikes, and joggers, increasing stress and distraction. Practice riding tips for safe crossing: keep your horse’s attention with gentle rein contact, use your body language to offer reassurance, and maintain a clear line of sight in both directions. Crossing a road with other riders? Group up, communicate with hand signals, and cross swiftly as a unit for safety. When facing trail obstacles—think rocks, water, logs, or even surprise wildlife—remain composed and give your horse time to assess each challenge. Encourage forward movement with soft leg squeezes, praise small steps, and never rush through tricky terrain. The great thing about regular trail rides is the opportunity to build trust and skill, making each ride safer and more enjoyable for all. Dealing with Unpredictable Trail Challenges Calm your horse during sudden encounters: When wildlife or hikers appear unexpectedly, stick to the basic principles of deep breathing, steady contact, and authoritative body language. Horses look to their rider for cues, so stay relaxed to ease a spooked mount. Best practices for road riding: Only cross at safe intersections. Use the front brake on your motion to control pace, keep horses grouped together, and always wait for a clear break in traffic before crossing. Overcoming obstacles and water crossings: Introduce your horse slowly, let them sniff or inspect obstacles if needed, and offer calm encouragement rather than pressure. A confident leader helps a timid rider—or horse—tackle nerves. Respecting wildlife and other trail users: Give space to animals, hikers, and cyclists you meet. Announce your approach, share the trail, and always yield to avoid stress or accidental injury—a mark of a responsible, prepared rider. Communicating with Your Riding Group and Rangers Discuss ranger ridge protocols: Some trails, especially those in managed space preserves or ranger ridge areas, have specific rules for group size, pace, or trail etiquette. Review these beforehand to ensure compliance and safety. Maintain clear signals with your group: Visual cues, voice commands, or simple hand signals help keep everyone informed about stopping, moving forward, or hazards ahead. Especially important in long distances or large open space preserves. Prepare for emergencies on the trail: Share emergency contact details, discuss plans for regrouping if separated, and ensure each rider knows how to use the rear brake on their horse effectively. Planning ahead protects you from the unexpected and helps everyone feel more comfortable during ride expeditions. People Also Ask Is trail riding hard on horses? Trail riding can be strenuous for horses, particularly if they aren't properly conditioned. Gradual exposure to longer distances helps build stamina, while regular shoeing protects hooves across rugged or rocky terrain. Taking frequent breaks to rest and hydrate lowers the risk of heat stress and ensures your horse can move forward confidently through any trail ride safely. How to get your horse used to trail riding? Begin by introducing your horse to new environments in short, easy sections. Reward calm responses to new sights, sounds, and smells on the trail. Increase the complexity of your trail rides as your horse gains confidence, and always proceed patiently, allowing both horse and rider to feel more comfortable with each outing. Do you tip after a trail ride? If you've booked a guided trail ride , it is customary to tip your guide—typically 10–20% of the total ride cost. Tipping shows gratitude for a safe, enjoyable experience and acknowledges the effort your guide put into ensuring your group’s safety and enjoyment throughout the adventure. What gear is best for trail riding? The best trail riding gear includes an ASTM/SEI-certified helmet, sturdy supportive boots, a comfortable saddle, a reliable trail map, and comprehensive emergency supplies. Prioritizing comfort, safety, and preparedness makes every ride safer and more enjoyable, especially when riding in open space or remote locations. Expert Answers to Frequently Asked Questions About Trail Riding Tips What is the best time of year for trail riding? Spring and fall are ideal, offering moderate temperatures and reduced insect activity. Be mindful of seasonal conditions like mud, heat stress, or slippery trails in winter. How do I handle a spooked horse on the trail? Remain calm and steady, use gentle reins and body cues, and allow your horse time to process the situation. Avoid rushing—a calm leader reassures your horse quicker than any command. Are group trail rides safer? Yes—riding in a group increases visibility, provides instant support in case of emergency, and helps less experienced or timid riders gain confidence on new trails. Watch experienced riders as they practice safe tacking, communicate with their equine companions, and expertly handle challenges such as road riding, water crossings, and wildlife encounters—all while following the riding tips outlined in this guide. Visual learners will appreciate a comprehensive walkthrough of trail safety gear essentials, including helmets, first-aid kits, proper boots, trail maps, and more. Learn how to pack for long distances, road riding, and unpredictable weather, ensuring you trail ride safely every time. Quick Reference: Trail Riding Tips Checklist Plan ahead and know your route Always wear safety gear Check your horse and tack Stay hydrated and prepared for emergencies Respect the trail and fellow riders Find More Riding Tips and Resources for Your Next Trail Ride Trail riding is an ongoing journey of learning, preparation, and gratitude. From mastering new riding tips to staying updated on local ranger ridge regulations or learning from seasoned guides, there’s always something new to discover. Visit trusted equestrian resources, connect with local groups, and share your experiences—each ride will build your skills and confidence for even greater adventures on horseback. “Every successful trail ride begins with preparation and ends with gratitude—for the ride, your horse, and the trail.” Take your next trail ride to new heights by preparing thoughtfully, respecting your horse and environment, and always prioritizing safety—every confident, enjoyable adventure begins with a single step onto the trail.

07.31.2025

ATV and UTV Terrain Navigation Tricks You Must Try

Did you know nearly 60% of ATV and UTV riders find themselves lost at least once due to navigation mishaps? The difference between a stressful emergency and an unforgettable journey often comes down to your ability to master ATV and UTV terrain navigation . In this comprehensive guide, you’ll unlock field-tested tricks, understand essential technologies like ride command, group ride radio, and advanced GPS systems, and confidently compare the top navigation products—so your next off-road adventure is not only safe but epic. Let’s dig into the tips, tools, and strategies that truly transform the way you ride. Revolutionizing Off-Road Adventures: Unexpected Stats About ATV and UTV Terrain Navigation Did you know nearly 60% of ATV and UTV riders get lost at least once due to poor terrain navigation? Discover how cutting-edge technology, like ride command and GPS navigation, is reshaping safety and adventure off-road. Mastering ATV and UTV Terrain Navigation for Every Rider Navigating unpredictable landscapes means you need more than just a basic map—you need dynamic, accurate guidance. The main keyword, ATV and UTV terrain navigation , encompasses GPS units, apps, and ride technologies tailored for rugged trails, mountain passes, and even legal public/private land transitions. Modern gps systems like Garmin Tread or ride command not only ensure you always know your location but also let you coordinate group ride adventures, mark crucial points of interest , and avoid trouble zones. Whether you’re an experienced enthusiast or new to off-road journeys, every rider should know how to configure a gps unit , utilize advanced group ride radio features, and make the most of offline maps. Embracing innovations like tread xl and ride command can mean the difference between confidently exploring unfamiliar territory and getting stranded. The following tips and ordered steps will help you unlock the true potential of these technologies for every environment. Understand your device: Essential tips for using GPS units on all terrain Embrace the power of ride command for group ride coordination Take advantage of Garmin Tread and Tread XL for specialized trail mapping Navigate public and private land legally and efficiently Top Reasons to Invest in Ride Command for ATV and UTV Terrain Navigation How ride command streamlines navigation across GPS systems and devices The beauty of ride command lies in its seamless integration with a variety of gps units . This robust system allows you to synchronize maps, routes with friends, and even points of interest across platforms—making it possible to pick up your ride exactly where you left off, no matter which device you use. For families, clubs, or anyone who prefers well-coordinated trips, the ability to update and track group members’ positions boosts both safety and fun on the trails. Unlike traditional gps navigation , ride command is designed to adapt in real time, adjusting for trail conditions, mapping preloaded topo trails, and supporting optimal group ride logistics. Even when cell service fades, ride command devices and compatible GPS units continue to deliver real-time navigation and communication, ensuring you’re never truly lost—just more adventurous . Integrating group ride radio for seamless group ride experiences Bringing group ride radio into your navigation setup takes off-road teamwork to the next level. With helmet comms and vehicle-integrated radios, ride command ensures you stay connected, even when miles (and mountains) separate your group. Messages, emergency alerts, and route updates reach every rider instantly, eliminating risky miscommunication. For events, family trips, or off-the-beaten-path journeys, the blend of ride command’s navigation prowess with group ride radio’s robust signal makes trail coordination effortless. This integration isn’t just about convenience—it directly enhances safety , efficiency, and the memories you create on every journey. "Ride command is a game-changer—no more paper maps, just pure riding." Comparing the Best GPS System and GPS Unit for ATV and UTV Terrain Navigation Comparison of Leading GPS Systems for ATV and UTV Terrain Navigation Device Key Features Screen Size Price Range User Reviews Garmin Tread Preloaded topo and trail maps; Group ride support; Weather overlays; InReach technology compatible 5.5" $599-$699 ★★★★★ Accurate, rugged, easy to use Garmin Tread XL Larger screen; More storage; Advanced group ride radio integration; HD mapping, public and private land overlays 8" $999-$1,299 ★★★★½ Excellent for pros & larger teams Powersport Navigator Intuitive interface; Custom waypoints; Water/dust proof; Real-time alerts 6" $499-$649 ★★★★ Simple, reliable, affordable Garmin Tread vs. Tread XL: Which GPS navigation is best for you? Deciding between Garmin Tread and Garmin Tread XL depends on your specific riding style and needs. The standard Garmin Tread is compact, portable, and perfect for solo riders or pairs who enjoy both marked trails and spontaneous side trips. Its friendly touchscreen display, preloaded trail data, and group ride integration make it ideal for most off-road explorations. On the other hand, Tread XL , with its larger screen and additional advanced mapping ( tread xl baja in desert or mountain terrain) is a favorite for organized rides, commercial tours, and anyone venturing into truly remote, unfamiliar territory. Its robust weather overlays, increased storage, and support for larger group ride radio networks ensure that even in the harshest environments, your navigation and group communications remain clear and reliable. How to choose a powersport navigator based on your ATV and UTV terrain navigation needs Selecting the right powersport navigator is all about matching features with your riding ambitions. If you stick to mapped trails and campgrounds, a basic gps unit with reliable weather updates and waypoints may be enough. For those routinely tackling off-grid or private land, prioritize devices with detailed preloaded topo maps, custom route planning, and support for inReach technology . Longevity and durability are musts: ensure your device is waterproof, dustproof, and has a screen size that’s readable in bright sunlight. For group excursions, make sure group ride radio or ride command compatibility is included, as these features are invaluable for safety, coordination, and maximizing off-road fun. Remember, a great powersport navigator doesn’t just direct you—it enhances every aspect of your adventure. Specialized Navigation for ATV and UTV Terrain: Tread XL, Baja, and More Exploring offroad maps—tread XL baja and garmin tread xl for desert and mountain terrain Adventure seekers know that no two trails are alike. For those pushing the limits in extreme environments, Tread XL Baja and Garmin Tread XL offer trailblazing mapping capabilities. Big, sunlight-friendly screens merge preloaded topo data with maps of North America , ensuring you have route guidance—even on the most relentless desert dunes or snow-covered mountain passes. The tread xl baja is specifically engineered for high-contrast environments, so every ridge, canyon, and hazard is clear, bold, and actionable. Riders venturing off the beaten path will value the direct access to weather layers, trail highlight overlays, and powerful route customization tools found in these models. With Garmin Tread XL Baja , you get precision turn navigation, location sharing, and the peace of knowing your mapping data has been purpose-built for the toughest regional conditions. Navigating points of interest on public and private land When your route crosses both public and private land , real-time navigation and accurate, up-to-date maps are critical. Top-tier devices like Garmin Tread XL and powersport navigator products are designed to flag property boundaries, restricted zones, and critical points of interest —helping you respect local regulations and enjoy safe, legal passage. Use these points of interest to locate campgrounds, gas stations, repair shops, scenic lookouts, and more, all while navigating public and private land boundaries. These enhanced points of interest features save time, reduce risk, and guarantee you make the most of every stop along your off-road adventures. Incorporating Group Ride, Group Ride Radio, and InReach Technology for Safer ATV and UTV Navigation Boosting safety and communication on every off-road journey Group ride and group ride radio integration are transforming the way teams navigate wild terrain. With group ride, every rider can track the entire team's location, receive instant detour instructions, and call for help at a moment’s notice. This synergy not only prevents separation but increases safety when exploring unfamiliar or potentially hazardous stretches of trail. Adding inReach technology to the mix raises the safety bar even higher. This life-saving feature lets you transmit emergency signals, two-way messages, and GPS coordinates—no matter how far you stray from cell service. For soloists and groups alike, these technologies deliver the confidence to explore new territory and respond quickly to unforeseen obstacles. Integrating ride radio and InReach technology for peace of mind The most advanced navigation setups now marry ride radio communications with inReach technology for unbeatable off-road safety. With real-time radio contact, you’re never truly alone, even on the remotest back-country run. If someone runs into trouble or needs support, help is just a button away—inReach can summon emergency services or relay critical messages, no matter your location. Combining regular gps navigation with the redundancy of emergency communication tools means you’re shielded against every curveball nature throws at you. Smart riders always ensure these technologies are fully synced and tested before hitting the trail, setting the stage for unforgettable, and much safer, outdoor adventure. People Also Ask: ATV and UTV Terrain Navigation What is the best map app for UTV trail riding? The top map apps for UTV trail riding are Garmin Tread, onX Offroad, and Polaris Ride Command . These apps are widely recognized for their detailed trail data, advanced waypoints, and seamless group ride compatibility . With up-to-date routes and the ability to integrate your ride command system or GPS unit, they are favored among riders for both solo trips and coordinated group rides. What is the best GPS for offroad maps? Garmin Tread XL and rugged powersport navigator devices are consistently rated as the best for offroad maps. Their strengths include preloaded trail information, real-time weather overlays, and reliable overlays of public and private land boundaries. Built for rugged environments, they deliver powerful performance—even deep in the backcountry—where accuracy and durability count the most. Does onX Offroad do navigation? Absolutely. onX Offroad is a top navigation app that provides comprehensive route planning, GPS navigation, and crucial off-grid features. From creating custom tracks and waypoints to offering trail status updates and public/ private land overlays, onX Offroad is well-equipped for ATV and UTV terrain navigation in both familiar and unfamiliar territory. What is the best ATV trail map? The industry’s best trail maps are found on Garmin Tread devices, Ride Command, and onX Offroad . They deliver current trail conditions, extensive points of interest, and comprehensive overlays for legal and safe riding . Riders appreciate these maps’ reliable updates and their ability to simplify navigation on even the most complex networks of trails. Essential Features of Leading ATV and UTV Terrain Navigation Devices Live weather updates and satellite imagery Detailed maps for public and private land use Robust points of interest search functionality Group ride and ride radio integration Setting Up Your GPS System for Ultimate ATV and UTV Terrain Navigation Initial device configuration for optimal GPS accuracy Downloading offline maps tailored to your terrain Creating custom waypoints and routes Safety checks: syncing inReach technology and group ride radio Optimal navigation starts with proper gps system setup . First, configure your device’s GPS satellite settings for maximum accuracy—often overlooked, this step ensures real-time positioning. Next, download offline maps suited to your specific region, paying attention to overlays for snowmobile trails, public/private land boundaries, and up-to-date trail closures. Customizing waypoints and planned routes lets you adapt trips on the fly, while final safety steps—like syncing your group ride radio and testing inReach technology—provide critical backup in remote, cell-free zones. Taking time for setup means you spend less time troubleshooting and more time riding smart. Maximizing the Benefits of Points of Interest in ATV and UTV Terrain Navigation Locate campsites, gas stations, and repair shops quickly Log geotagged trail highlights and hazards Plan group ride breaks and checkpoints using ride command Efficient use of points of interest transforms a basic ride into a memorable journey. Whether you’re searching for the nearest campsite, a fuel station, or a scenic overlook, modern GPS units and ride command apps help you find essential stops without wasting valuable riding time. Logging trail highlights and hazards provides a collective knowledge base for your group and helps new riders prepare for the route ahead. Especially in group ride scenarios, these points enable you to schedule checkpoint breaks, ensure no one gets left behind, and maximize enjoyment by connecting riders to cool, lesser-known attractions—elevating every adventure from good to extraordinary. Public and Private Land Navigation: Legal and Safety Considerations "Always verify whether trails cross into private land, and use GPS systems that differentiate between public and private land boundaries." Navigating the intersection of public and private land is not just about convenience—it’s a matter of legality and respect for property rights. Advanced gps systems like Garmin Tread XL and Ride Command highlight these boundaries for you, reducing the risk of trespassing and keeping your adventure both safe and legal. Before every ride, you should update your device’s maps and double-check all planned routes for land use changes. Legal compliance on the trail protects your riding privileges and the local environment. Always pause to verify trail access, especially near fence lines or property boundaries. Responsible riding, combined with technological support, ensures all riders can enjoy off-road experiences for years to come. Upgrading Your Adventure: Accessories for Enhanced ATV and UTV Terrain Navigation Rugged mounts for tread xl and Garmin Tread Protective cases for GPS units Charging stations for group ride radio and inReach devices Outfitting your navigation setup with the right accessories can be just as important as choosing the ideal GPS system. Rugged, vibration-resistant mounts keep your devices secure through mud, rain, and rock-strewn trails. Shockproof, waterproof cases protect sensitive hardware from environmental hazards and accidental drops. Don’t overlook portable charging stations that support extended use of group ride radio , GPS units, and inReach devices. Smart accessory investments lead to fewer interruptions and more reliable communication—guaranteeing your technology works as hard as you do, no matter what the terrain demands. User Reviews: Real World Experiences with Ride Command, Garmin Tread, and Powersport Navigator "Garmin Tread’s off-road map accuracy saved our ride when the weather turned and trails disappeared." Real riders put these navigation products to the test in the toughest conditions. ATV clubs report that ride command is their go-to system for group ride coordination and instant detour alerts. Weekend warriors love the Garmin Tread for its friendly touchscreen display and intuitive setup, noting that its weather overlays and robust points of interest have saved rides on more than one stormy day. Powersport navigator fans especially highlight the affordability and rugged simplicity—ideal for beginners or as a backup unit for your gear bag. Across all devices, users agree: modern ATV and UTV terrain navigation technologies have elevated safety, enjoyment, and what’s possible in extreme environments. Watch a step-by-step walkthrough on configuring Ride Command for group ride —from creating ride groups, syncing devices, and tracking friends to sharing routes and using group ride radio for real-time communication. This visual guide makes setup fast, simple, and stress-free for every rider. See side-by-side demonstrations of Garmin Tread, Tread XL, and leading Powersport Navigator units. Key factors like screen size, interface, weather overlays, group ride functions, and battery life are compared in real-world trail conditions—so you can make an informed purchase based on features that truly matter. Frequently Asked Questions about ATV and UTV Terrain Navigation Can I use a smartphone instead of a GPS unit for ATV and UTV terrain navigation? While smartphones with navigation apps like onX Offroad work in many areas, dedicated GPS units are better suited for extreme environments. They provide durable, waterproof hardware, longer battery life, comprehensive offline trail maps, and critical features such as group ride radio and inReach technology support unavailable on most phones. How often should I update my GPS system’s maps? It’s recommended to update your device’s maps before every major ride or at least every quarter. This ensures you have the latest trail access data, land boundary changes, and points of interest for both public and private land. Most GPS units make map updates quick and user-friendly. What should I do if my GPS loses signal off-grid? Move to a higher elevation or clear area for better satellite exposure. Always download offline maps beforehand, and carry a backup navigation tool like a paper map or compass. If you use inReach technology, you can still transmit emergency messages even without GPS signal. How does group ride radio improve safety and coordination? Group ride radio lets all members communicate instantly, relay route changes, or call for help. It ensures everyone stays connected and accounted for—even in terrain where cell service is unavailable—making it a critical safety feature for coordinated off-road navigation. Your Next Off-Road Adventure Starts Now: Find the Perfect ATV and UTV Terrain Navigation Solution Explore top-rated powersport navigators Take advantage of advanced ride command features Compare Garmin Tread series devices for your terrain Begin your search for the best navigation system—and elevate your ATV and UTV experience Ready to master every mile? Upgrade your navigation gear and redefine what’s possible on your next off-road adventure!

07.31.2025

Improving Riding Balance: Secrets to Steady in the Saddle

"Studies show that over 70% of riding-related accidents can be traced back to issues with poor balance. Mastering improving riding balance is not only an art—it’s a safety essential for every equestrian." Unlocking Good Balance for Riders: Why Improving Riding Balance Matters Whether you’re a beginner saddling up for your first lesson or an advanced dressage rider refining your craft, improving riding balance is the key foundation to every aspect of horsemanship. A rider’s ability to maintain balance isn’t just about looking elegant in the saddle; it directly impacts your safety, the effectiveness of your aids, and the confidence you project to your horse. Good balance fosters instant reaction time to unexpected situations, helps the rider remain centered even if the horse spooks, and fundamentally supports every other riding skill. The impact of good balance goes beyond personal assurance. When your center of gravity is consistently aligned with the horse’s motion, your equine partner senses stability and develops trust. This trust promotes clear communication through subtle cues like leg aid and weight shifts, encouraging better cooperation and performance. Recognizing common misconceptions —such as believing balance comes naturally, or only with years of experience—helps riders prioritize targeted improvement from the start. The vital connection between improving riding balance and rider confidence Impact of good balance on horse trust and communication Common misconceptions about achieving steady balance in the saddle What You Will Learn: Steps to Improve Your Riding Balance This detailed guide will walk you through a clear, actionable path for improving riding balance , anchored on proven strategies used by elite riders. You’ll gain insights into how your riding posture shapes stability, discover practical exercises that directly target common weaknesses, and learn the critical role of core strength and upper body control. Plus, get a glimpse into the specific routines advanced dressage riders follow to craft a dynamic, responsive seat. Understanding riding posture and its direct impact on improving riding balance Practical exercises and training programs for balance improvement Role of upper body and core strength in overall stability Tips used by advanced dressage riders to maintain a good balance Comparison of Common Balance Issues vs. Solutions for Improving Riding Balance Common Balance Issue Solution Leaning ahead or behind the movement Recheck head-shoulder-hip-heel alignment; practice with mirrors or video Unsteady legs or excessive grip with lower leg Develop independent seat; strengthen core muscles with targeted routines Tension in upper body or locked elbows Do stretching exercises and breathing drills before mounting Lack of reaction time during sudden horse spooks Integrate ground pole and transition exercises for good proprioception Poor posture/rounded shoulders Install a feedback loop with frequent trainer check-ins The Science Behind Improving Riding Balance and Posture Effectively How Body Mechanics Drive Good Balance At the core of improving riding balance lies a simple truth: the way we use our bodies in the saddle dictates our ability to communicate and move with the horse. A balanced seat means your weight is distributed evenly, avoiding unnecessary pressure on either side of the horse and supporting a consistent center of gravity . Effective riders focus on aligning their head, shoulders, hips, and heels into a straight line—a posture that promotes both stability and clarity of aids. Anatomy of a balanced seat in the saddle Aligning head, shoulders, hips, and heels Indicators of poor vs. good posture Riders often confuse looking “upright” with achieving good posture . However, true body alignment involves relaxed, open shoulders, a long spine, and flexible joints. Common indicators of poor posture include gripping with the lower leg , slouching forward, or tilting too far to one side. Correcting these details not only helps the rider, but also gives the horse clearer signals, making every movement—from transitions to sitting trot—smoother and safer. Core Strength: Foundational for Improve Balance in Riding Core strength is the linchpin between a static seat and one that can adjust dynamically with the horse. Unlike surface-level muscles, your core muscles stabilize every transition in the saddle and allow for quick adaptation when the horse changes pace or direction. Targeted core exercises—such as planks, supine leg lifts, and twisting crunches—help riders build the strength to maintain a steady position in the saddle, even through extended sessions or unexpected maneuvers. Targeted core exercises for riders Training program suggestions for core improvement Dressage rider insights on core stability and riding posture Leading dressage riders stress the importance of regular, incremental core workouts. Building a training program around short but focused exercise sessions makes it easier to stick to routines, activate muscle memory, and develop the strength to maintain good balance even when fatigued. Over time, these routines create a feedback loop where improved stability enhances both your riding posture and your overall effectiveness as a rider. "A strong core is the silent hero of every skilled rider when it comes to improving balance and staying safe during movement." Demonstration: Step-by-Step Core Workouts to Improve Riding Balance Watch this video for easy-to-follow core strengthening routines designed specifically for riders wishing to improve balance, boost athletic performance, and prevent common injuries sustained during equestrian sports. Key Riding Posture Adjustments to Improve Your Balance Instantly The Role of Upper Body in Achieving Good Balance Often underestimated, your upper body functions as a key stabilizer when it comes to improving riding balance . Keeping the shoulders broad and level distributes your center of gravity down through the hips and into your seat bones. Riders are frequently taught to “open the chest” and “soften the elbows”—tips that encourage a softer connection with the horse’s mouth and smooth out communication during abrupt stops or transitions. Shoulder and arm alignment for stability How to relax tension in neck and back Examples from leading dressage riders To avoid tension in the neck and back, experienced trainers recommend incorporating stretching exercises pre-ride. Examples from elite dressage riders show that gentle neck rolls and shoulder shrugs help reduce stiffness that could be transferred inadvertently to the horse. By consistently training attention onto your upper body , you’ll notice improved responsiveness, better seat control, and a more secure feeling even during challenging movements like a sitting trot or a quick change of direction. Leg and Seat Adjustments to Supercharge Balance Improvement Your legs and seat form the foundation for steadiness in the saddle. Using your thighs and calves for gentle guidance—without gripping tightly—allows the horse to move freely beneath you and encourages a more effective partnership. Proper foot position, with heels down and ankles slightly flexed, establishes a steady base for every stride, while releasing excess tension from the lower leg safeguards against miscommunication. Using thighs and calves for guided movement Proper foot position for steady base Signs you need to adjust your seat for improving riding balance A key sign that you may need to adjust your seat is regular tipping forward, struggling to sit in a straight line , or losing rhythm in gaits like the sitting trot. Frequent exercises, such as riding without stirrups or practicing leg lifts while mounted, foster an independent seat and refine your proprioception. Remember: small shifts in your pelvis, combined with even pressure through both seat bones, deliver cues to the horse and preserve your balance over long rides. Developing an Effective Training Program to Improve Riding Balance Integrating Balance Exercises into Daily Riding Routines Improvement happens when practice becomes habit. The strongest results come from weaving balance exercises into every riding session, regardless of discipline or experience level. For beginners, exercises like riding circles, holding two-point position, and practicing riding without stirrups offer a manageable starting point. Intermediate and advanced riders can benefit from sophisticated drills such as transitions within gaits or balancing over trot poles. Simple practices for beginners to advanced Lunge lessons and their balance benefits Feedback from trainers on balanced riding posture Lunge lessons , in particular, are invaluable for isolating the rider’s position and correcting habits without the complication of steering. Trainers frequently recommend lunge sessions to address imbalance, encouraging riders to close their eyes or drop reins to heighten awareness of their center of gravity and body control . Regular feedback from a knowledgeable instructor refines these routines and ensures long-term balance improvement . Dressage Rider Focus: Balance Improvement Techniques that Work Dressage riders are often seen as the masters of subtle, precise rider balance. Their training revolves around exercises like pole and grid work—which encourage an even, rhythmic seat—and developing the famed independent seat through practice of transitions and lateral work. Dressage-specific core drills, such as controlled rising trot cycles or C-shape contractions, create good posture that supports clear, effective communication with the horse. Pole and grid work for improving balance Independent seat development Dressage-specific core drills for good posture These techniques, refined over years and generations, prove that no matter your initial skill, it’s possible to improve your balance and excel in any discipline. Consistency with these exercises fortifies core muscles, accelerates reaction time, and brings about lasting confidence in every ride. Top-Rated Lists: Tools and Exercises to Improve Your Riding Balance Today Must-try balance improvement exercises at home and in the arena Equipment for enhancing upper body and core strength Apps and technology for tracking balance progress There are plenty of ways to improve balance both on and off the horse. At home, try standing on a balance board or a stability ball, simulating the micro-adjustments needed to ride. In the arena, integrating exercises like transitions between gaits, ground pole navigation, and riding without stirrups systematically strengthens body control. Riders can also use resistance bands, BOSU balls, and weighted medicine balls for extra focus on core and upper body stability. Technology, too, plays a growing role. Smartphone apps and wearable trackers monitor your posture, track session improvements, and offer visual feedback. Using these, riders of all levels can set benchmarks and celebrate progress as their balance improves week by week. List of Balance Exercises Ranked by Effectiveness for Riders Exercise Location Target Zone Effectiveness Riding without stirrups Arena Core, independent seat ★★★★★ Stability ball planks Home Core, upper body ★★★★★ Ground pole serpentines Arena Leg aid, coordination ★★★★☆ Resistance band shoulder extensions Home/Gym Upper body, posture ★★★★☆ BOSU ball squats Home/Gym Core, stability ★★★★☆ Common Pitfalls That Sabotage Improving Riding Balance (and How to Fix Them) Overlooking the importance of a structured training program Ignoring upper body weakness and posture How dressage riders address balance errors early Even the most ambitious equestrians sometimes make mistakes that sabotage their journey toward improving riding balance . One common pitfall is neglecting to follow a structured training program , which can result in slow or inconsistent progress. Riders may also overlook upper body weakness or rigid posture, leading to compensations that unsettle the horse or create imbalances over time. The wisdom of experienced dressage riders is to tackle balance errors early—before they become ingrained habits. They recommend regular video analysis, close collaboration with trainers, and keeping flexibility and muscle strength as top priorities. By admitting and actively correcting these pitfalls, you’ll make steady, confident progress along your balance improvement journey. "The path to improving riding balance is paved with persistence, feedback, and a willingness to adapt old habits." People Also Ask about Improving Riding Balance What Exercises Help Balance a Horse? Ground pole work, serpentines, and transitions How these exercises contribute to the rider’s balance improvement Ground pole work, practicing serpentines, and making frequent transitions between gaits are classic exercises used to improve your balance and help the horse carry itself evenly. These drills encourage the rider to maintain an elastic connection, refine their seat, and build better proprioception. When both horse and rider move in harmony, improvements in straightness and reaction time follow naturally. What is the 20% Rule in Horse Riding? Explanation of the 20% rule (horse can carry 20% of its own weight) How proper balance maximizes safety within this guideline The 20% rule is a benchmark suggesting a horse shouldn’t carry more than 20% of its own body weight, including tack and rider. Maintaining good balance is critical within this rule: an unbalanced rider puts extra strain on the horse’s back—even if the weight is technically acceptable. By sitting in alignment, you distribute weight evenly and support the horse’s long-term wellness and performance in any equestrian sport . What is the Best Exercise for Improving Balance? No single best: effective balance improvement comes from varied, repeatable routines Most-recommended core stability workouts for riders There isn’t one definitive exercise for improving balance ; a combination of core stability drills, targeted stretches, and mounted routines yields the strongest results. In particular, planks , torso rotations, and riding without stirrups are regularly endorsed by trainers. Repeated, focused sessions build strength and muscle memory—ensuring progress for riders at all levels. Can Poor Balance Be Improved? Scientific evidence supporting continual improvement Stories from riders who improved balance through targeted training Absolutely—research and first-hand stories confirm that poor balance can be improved at any age or experience level. Scientific studies highlight the brain’s and body’s capacity for adaptation through regular, deliberate practice. Numerous riders have overcome initial instability by committing to a thoughtful training program and integrating core muscle workouts and feedback into their weekly routines. Frequently Asked Questions on Improving Riding Balance How long does it take to notice improvement in riding balance? With consistent training, most riders begin feeling a marked improvement in two to six weeks. Small changes in stability, muscle memory, and posture appear first, especially when supported by feedback and varied exercises. Sustained effort ensures growth continues over the long term. Should I train off the horse for better balance? Yes, off-horse exercises—like planking, stretching, and stability ball drills—complement mounted work, rapidly strengthening the core muscles needed for balance. The combination speeds up your reaction time and ability to control your body's movements during rides. What signs should I look for that my posture is holding me back? Signs include discomfort or exhaustion after short rides, constant corrections from trainers about rounded shoulders or gripping with the lower leg , or difficulty maintaining the correct position in the saddle over transitions. Addressing these signals early leads to continuous balance improvement. Can I improve my balance if I only ride once a week? Absolutely—regular off-horse training and focused sessions during your weekly ride build significant improvement over time. Consistency is key, even if time is limited. Use the days between rides for targeted balance improve routines and core exercises. What role does horse fitness play in the rider’s balance? A well-conditioned horse maintains even movement, making it easier for the rider to find and keep a good balance. Balanced muscle development in both the horse and rider leads to safer, more enjoyable rides, and faster progress toward mutual athletic goals. Core Strategies and Final Thoughts for Riders Serious about Improving Riding Balance Key takeaways: posture, consistency, and feedback loops Embrace new technologies and trainer feedback for faster balance improvement Encouragement: every rider can master steady balance with effort and knowledge Mastery of improving riding balance comes from relentless attention to riding posture , carefully-constructed training program s, and a willingness to integrate feedback. Embracing technologies and guidance speeds the journey, while personal commitment ensures every rider—regardless of current skill—can find their steadiness in the saddle and transform riding experiences for both themselves and their horses. Your Path to Improving Riding Balance Starts Now Ready to revolutionize your riding? Start your own training program today, share your progress, and stay committed to constant improvement in riding balance.

Terms of Service

Privacy Policy

Core Modal Title

Sorry, no results found

You Might Find These Articles Interesting

T
Please Check Your Email
We Will Be Following Up Shortly
*
*
*